Showing posts with label Embellishment Techniques. Show all posts

Sunday, August 14, 2016

Plastron Blouse


Style 114 from the July 2016 issue of Burda Style Magazine features a wonderful blouse with an embellishment technique commonly referred to as the weaving of fabric strips. Burda Magazine refers to the front inset as a "plastron" which is a trimming, like a bib, for a woman's dress. In the late 18th century, a plastron typically featured lace or embroidery.
My version is made from red cotton oxford purchased at Vogue Fabrics in Evanston, Illinois.
The buttonholes are hidden to not detract from the plastron. The fabric strip weaving is not difficult to do but requires accuracy in sewing.
I added an elastic thread loop and button at the top of the buttonhole band to keep the top edge flat against the garment front neckline.
The blouse back is simple with a standard tailoring pleat at center back. Fit is loose and comfortable. Since the fit was loose, I made just one sleeve for the muslin. On a fitted garment, I would add both sleeves to check fit across the shoulders, chest, and back.
No pattern changes, not even the addition of a bust dart!
To improve the construction quality of the plastron, I have written a few comments. It would be fun to try the weaving technique on other garments in different ways. 

Construction Notes:
Mark stitching lines so that decorative strips are uniform width. I mark the width of the finished fabric strip rather than the seam allowance. That way if the seam allowance is cut unevenly, the finished fabric strip will be accurate.
Stitching line are marked in blue.
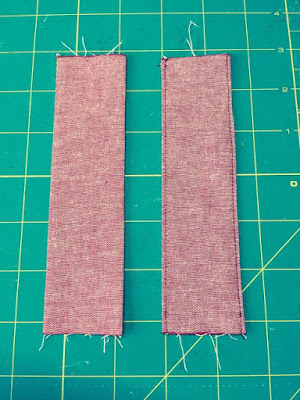
Strip has been stitched and seam allowance pressed open. One seam allowance is ungraded (1/2" wide) while the other seam allowance is trimmed to 1/4". This makes the seam allowances less noticeable from the right side.
I prefer the look of the fabric strip on the left. It has no top-stitching. I decided to top-stitch the strips because I wanted the blouse to launder well and not require complicated pressing.
At left is the plastron with the placement of the fabric strips marked in chalk. The strips must fill the spaces exactly without being too wide nor too slim. If you mark the stitching lines as discussed above, this will not be difficult to achieve. At right the strips are pinned in place alone the marked lines. The strips will be trimmed to the proper shape later.
View of inside of the plastron
If you mark and stitch accurately, the right and left sides of the plastron will match nicely.
The center front seam allowance is 5/8" in the above photo. My pattern has 1/2" seam allowances so despite my careful sewing, I am off 1/8" on each side of the blouse front. Therefore the total error is 1/4". I will widen the buttonhole band 1/4" to make up for the error. If chasing a 1/8" error is not your idea of fun, then let it go! The blouse fit is loose and it will be just fine whether you correct the error or not. This technique should be fun!

Monday, June 8, 2015

Embellishment with Nail Heads

The Simplicity 1277 dress I just completed might have been a bit dull without the nail head embellishment.
I would wear the dress with black strappy sandals in the evening, perhaps with a biker-style jacket on top (I have sewn many!).  For day flip flops are fine, for fall weather, perhaps black leather boots and a jacket.
The nail heads were purchased from M&J Trim online, 100 6mm antique gold round nail heads for $5.  I used a heat tool to apply each individual nail head.
"Heat-fix" or "hot-fix" tools come with a variety of "tips" to accommodate various sizes of crystals.

The tool heats up within two minutes.  The tool tip is extremely hot so never test it for readiness by touched it.  Instead, attempt to attach a crystal to a scrap of fabric and judge the result.  When the crystal is attached, it will be uncomfortably hot to touch, so use an insulated glove to press each crystal in place.
I bought my tool more than ten years ago.  I believe they are still readily available.

Back to Simplicity 1277.  The dress has diagonal top-stitching on the bodice side front and side back panels that are perfect for embellishment.
Near the point of the waist seam, you see what looks like two nail heads too close together.  I dropped a heated nail head and it landed in the wrong place, so you are seeing one nail head and one blob of glue that will I will use tweezers to pull off the garment when the glue has cooled.  The embellishment doesn't look like much at this point.
The design is building but at this point I am wishing I had placed the diagonal stitching lines further apart so I could attach fewer crystals.  It will take at least two hours to affix each crystal in place, and I expect to use almost 400 crystals.
June 2015
Well, it took over 400 nail head crystals but the result is cool.  Next time I will place the nail heads a little further apart as it took almost 8 hours to affix the crystals!
The dress might have been a bit dull without the nail heads, but it can be dressed up or down easily depending upon shoes/boots and accessories.

Two Tutorials are Finished

During the Spring semester at College of DuPage, I taught Clothing Construction One.  We made a dress, Simplicity 1277, and a blouse, McCall's 6898.  Though the students finished their garments weeks ago, I did not find the time to finish mine until now.  To conclude the tutorials, here are the final photos.  The gold nail heads on the dress will be discussed in a separate post later today.
Simplicity 1277
If the garment does not look familiar to you, refer back to my posts beginning 2/10/15.
Heat-fix nail heads on side panels
View from front
A traditional button-down shirt is a great learning tool.  Here are photos of McCall's 6898.  The step-by-step tutorial began on 3/19/15.

Saturday, January 10, 2015

A New Zipper for the Black Leather Dress

Recently I wore my new black leather dress which was discussed in the 10/18/14 post 'A Classic Black Leather Dress.'  The fit of the dress is good, but the appearance of the zipper at the neckline bothered me.  The solution?  I removed the zipper and replaced it with a longer zipper.  Here is the revised dress:
A new zipper for the leather dress; note its appearance at the neckline is smooth
The zipper travels over the shoulder and down the back for a few inches.  I used all 48" of the zipper.
The zipper on the back of the dress is an unexpected design detail.
Below is the original dress.  If you look closely, you can see that the zipper top ends at the neckline which is not unusual.  The problem is that the top of the zipper, in my opinion, became a focal point of the garment.
With the new zipper treatment, I feel the viewer's eye returns to the interesting triangular panels of the dress.  I do not enjoy revising new garments, but the second zipper was quick and easy to install.  I plan to wear this garment for many years so I want it to be as pleasing as possible.

Saturday, December 13, 2014

Knits Collars and Cuffs/Marsala: the 2015 Color of the Year

The Pantone website has been abuzz with discussion of the 2015 color of the year, Marsala.  What a stroke of luck that my stash contained a sweater knit, purchased two winters ago, in Marsala!  Wine, burgundy and maroon are my favorite colors for decorating.  In addition, they are flattering on many skin tones.  If you are interested in learning more about the color trend, visit the Pantone website at https://www.pantone.com/pages/index.aspx?pg=21163&from=hp

Here is my new wool sweater coat:
Burda Style 111 from the 3/2014 issue
The pockets hold a firm shape because I applied fusi-knit to them.  Pockets that collapse can be attractive in a sweater knit, but I prefer this look.
Many people do not like loose garments, so the coat can be belted to define the waist.  The faux fur hat is from the 12/5/14 post 'A New Fur Hat.'
The collar and cuffs are a heavyweight knit purchased from Wawak at http://www.wawak.com/products/search.cfm?KEYS=KNt-10&x=0&y=0.  The quality of the knit is wonderful, and the price is reasonable. 
For the collar, I actually took the heavy-duty waistband (item KNT-12, $4.85) and cut a 4.5" x 18" collar.  The edges of the collar are unfinished. 

Below is a comparison of the heavy-duty knit cuffs (on the left, $2.95 per pair) and the regular knit cuffs (on the right, $1.75 per pair).  Both are excellent quality and would have worked in my sweater coat.
The cuffs, collars and waistbands are packaged so neatly.
Color choice is beige, black, brown, navy or white.  I definitely recommend these products for use on knit garments.

Sunday, September 28, 2014

Colorful Tees

Thanks for the thoughtful comments about the leather jacket.  It seems that leather is interesting to many sewers.  I am organizing a leather dress project as well as several jacket projects.  In the meantime, I thought I would show you some quick knit projects I completed recently.  The beauty of knit tops is they are perfect projects for when I am tired or only have a little time to sew.  I like to sew a balance of easy and couture.  The fabrics are a wonderful quality of cotton/spandex, and I purchased them at https://www.fabric.com/.  The price per yard was not low, but the quality far exceeded my expectations.  I was in the mood for color and pattern, so they are definitely not "neutrals"!
Style 120 from 8/2014 Burda Style
It was fun to play with the stripes (look at the two sleeves).  It has been a while since I mentioned that my all-time favorite pattern company is the Burda Style magazine which is a monthly magazine subscription.  I purchase the English version at https://www.glpnews.com/EN/Crafts/Burda1.html.  The black leather dress I will be featuring in a few weeks comes from the current semi-annual issue of Burda Easy which is readily available in sewing stores and at https://www.glpnews.com/EN/Crafts.  /EasySewing1.html.
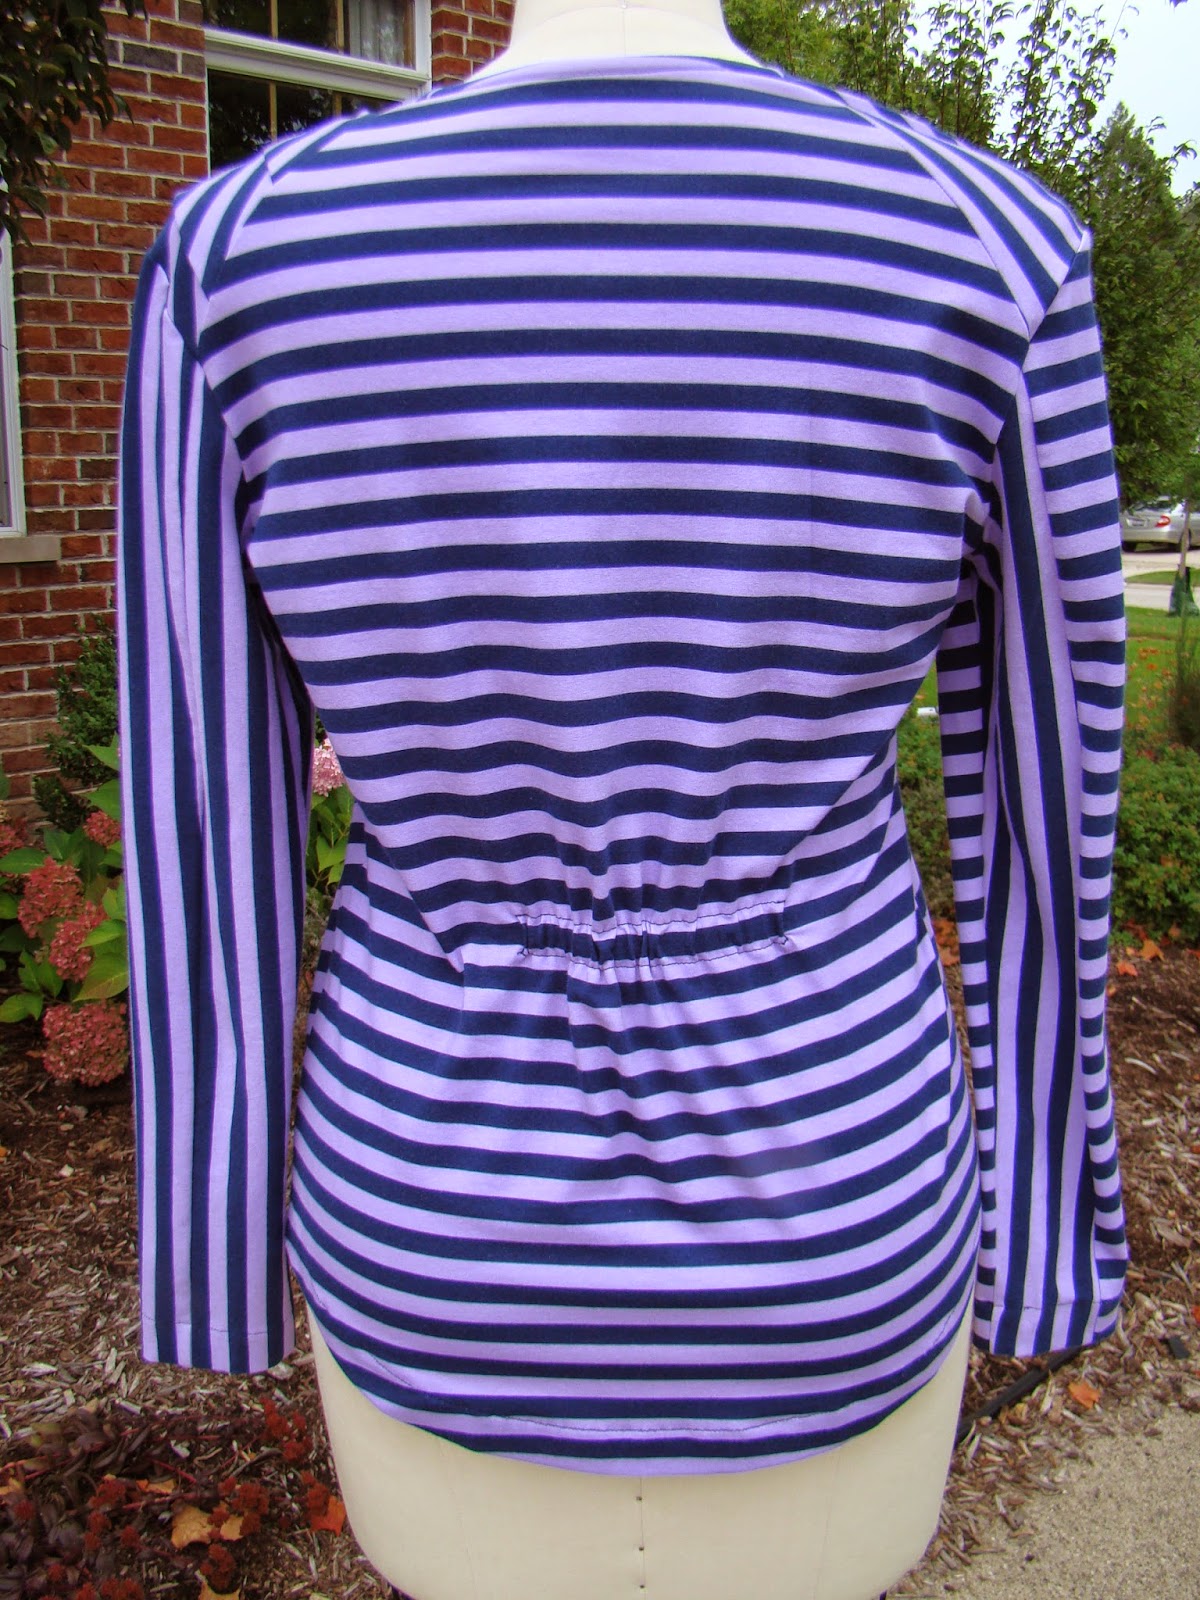
To make a tee more fitted, you can add a waist line casing and elastic in back.
Style 120 from 8/2014 Burda Style
Red is always a fun color to wear.  If the colors of these tees seem too strong to you, remember they might be perfect under a blazer.
The integrated scarf is easy to sew and quite clever.  Burda patterns have unique features and are very accurately drafted.  I have never found a pattern to fit strangely or be drafted with errors.
Style 131 from 8/2013 edition of Burda Style
The pink tee has a scarf that wraps round the neck.  The scarf is part of the front panel and cannot be removed from the tee.

Prints don't always agree with me.  I added heat-set crystals, perhaps 100, to the pink tee.  The crystals made me feel more comfortable wearing the print for some reason. 
Style 131 from 8/2013 Burda Style
The scarf tee in emerald green is very useful as it looks great with navy and gray as well as black and khaki.
Silhouette pattern #150
Black and white seem like a relief after all that color.  Hounds tooth and polka dots for fun.  I'll have two dresses to share soon, and then I plan to focus on jackets and coats, couture as well as easy to sew.  Thanks for reading.

Sunday, January 26, 2014

My Nordstrom Knit Dress

I like this dress that appeared in a recent Nordstrom catalog.  It is a simple princess line knit dress with added fullness in the lower side front and side back panels.
While the dress is not expensive for Nordstrom standards, I would prefer to sew the dress rather than purchase it because I want custom fit, a longer length, and a different color and fabric.  Other than that the above dress is fine!  I'll show you the pattern work so you can recreate the look also.

Step 1.  Start with any princess seam dress pattern.   Below you see the Side Front panel recreated on tracing paper.  By the way, I purchase canary yellow rolls, 24" x 25' or 50', from Dick Blick online. Be sure to trace the grain line.
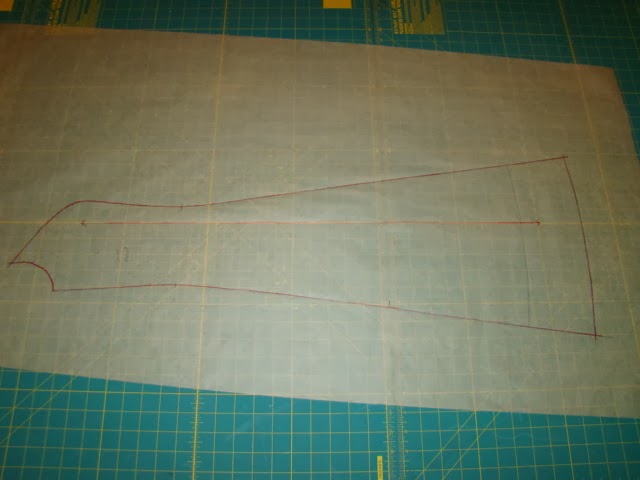
Side Front panel
Step 2.  Raise the hem 12".
Step 3.  Raise the hem 12" on the traced Side Back panel.
Side Back panel
Step 4.  Lay the Side Front and Side Back panels, aligning the side seams.
Side Back and Side Front panels
Step 5. Transparent tape the side seams together below the new 12" mark.
Step 6.  Add fullness to the lower sides.  You are not adding fullness above the 12" mark.
Step 7.  Separate the 12" deep flounce pattern you just created.  Add seam allowances where needed.
Modified Side Front and Side Back
The Side Front panel is now 12" shorter than on the original pattern.  I added a 1/2" seam allowance along the bottom.  Same for the Side Back panel.  There are no other changes to these panels.

Step 8.  Add a seam allowance to the top of the flounce pattern; I added 1/2" at the top/narrow edge.  
The grain can be along the old side seams which is the center of the flounce.  I have also drawn a bias grain line for a slightly different drape.  I plan to cut my flounce along the bias grain.  
Fabric color is accurate in this photo
 I chose a textured cotton/lycra knit from Vogue Fabrics, on sale last fall for $5 per yard. 
photo highlights fabric texture
 The flounces add movement to the dress design.