Attach the yokes as follows:
 |
| Shirt back is sandwiched between two yokes |
|
The yoke is pinned to the shirt back right sides together. The right side of the yoke facing is pinned to the wrong side of the shirt back. Stitch through all layers and press seam allowances up to the yokes.
 |
| grade seam allowances |
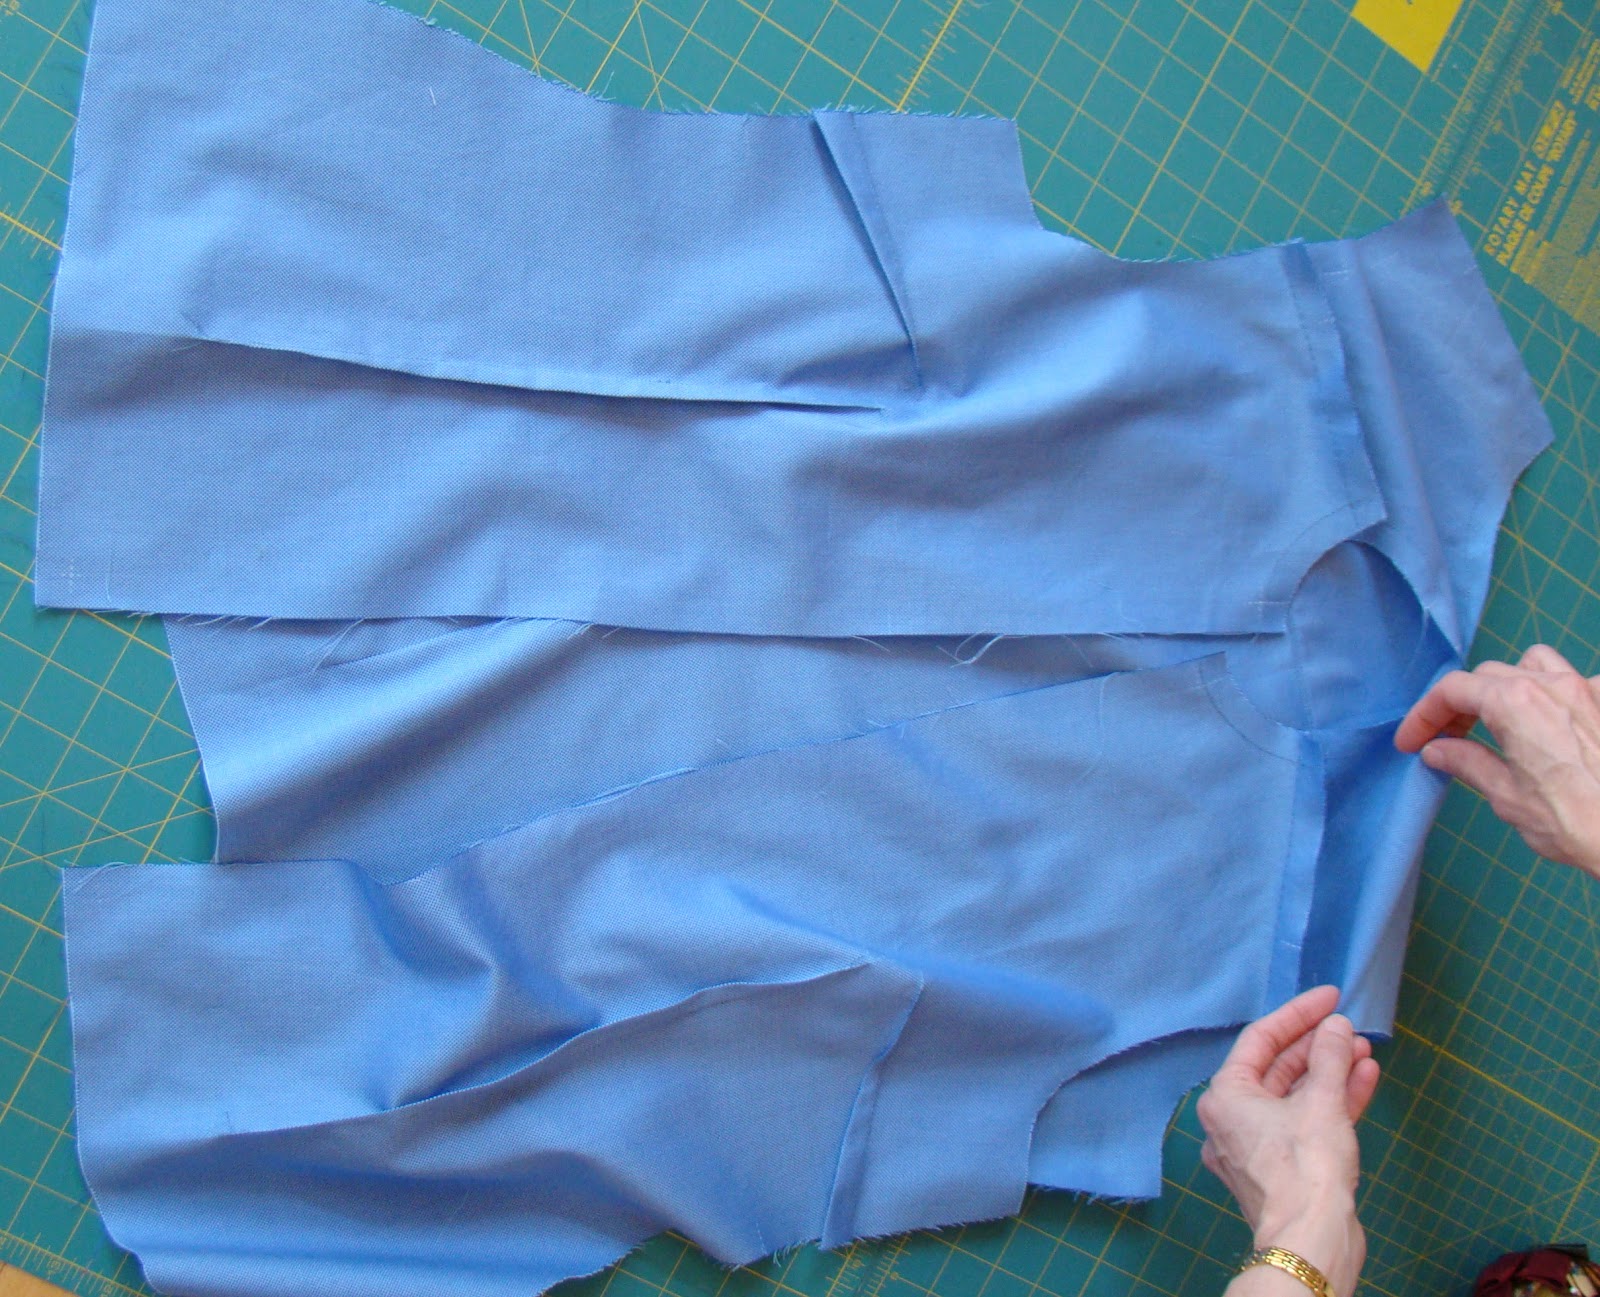
|
Grade the seam allowances by removing 1/8" from the shirt back seam allowance and 1/4" from the yoke facing seam allowance.
 |
| baste shirt fronts to yoke right sides together | | | | | | |
|
Baste fronts to yoke leaving yoke facing free.
 |
| lay front shoulder of yoke facing in place |
|
On inside of shirt lay yoke facing front seam allowance in place.
Reach inside and pin yoke facing to yoke and shirt front.
 |
| check your pinning before you stitch |
|
Stitch front shoulder seams. Press seam allowances to yoke. Grade seam allowances trimming 1/8" from shirt fronts and 1/4" from yoke facing.
 |
| topstitch as desired |
|
Top stitch the yoke along the front and back edges. I decided to also top stitch the darts. Top stitch the vertical darts but not the horizontal bust dart.
 |
| shirt back |
|
Top stitching on the front and back are complete.
French side seams: Pin side seams wrong sides together. Stitch 3/8" from cut edges.
 |
| step one |
|
Press seam allowances toward garment back. Trim to less than 1/4".
 |
| step two |
|
Turn garment to inside along stitched side seam. Pin with stitched line at edge. Stitch 1/4" from fold.
 |
| step three |
|
Hem: Press up 5/8" along lower edge of garment. I added a shirt tail shape to my garment by cutting away 1.5" at the side seam and blending to the garment front and back. Pin the pressed hem allowance in half and stitch in place 1/4" from bottom edge.
 |
| hem | |
Front Bands: Press front bands under 1/2" along unnotched edge.
 |
| front band |
|
Flatten pressed seam with a clapper or block of wood.
 |
| clapper to flatten seam allowance |
Pin placket to garment front, matching notches. Stitch 5/8" from cut edges. Press seam allowances to band.
 |
| step one |
|
Grade seam allowances and press lower edge of band up to match hem depth.
 |
| step two |
|
Pin pressed edge of front band over seam that joined band to garment front. You are pinning on the inside of the garment.
 |
| step three |
Top stitch on right side of garment, beginning at neckline and pulling out pins as you stitch down the garment. First stitch where the band meets the garment; that is the left line of stitching in the photo below. Stitch across hem. Then press front band and stitch outside edge of front band.
 |
| step four |
|
Collar: Stitch center back seam of modified collar. Press open. Pin collar edges right sides together. Stitch from middle of collar to edge, then flip collar and stitch from middle to other edge.
 |
| short edges are folds with the modified collar |
|
Trim collar as shown below. Press seam allowances open.
Turn collar right side out and neaten with a plastic point turner. Press. Topstitch.
Shape collar by folding it to mimic wearing position. Baste edges and trim excess under collar seam allowance. Verify that left and right sides of collar are equal in all dimensions; trim if necessary.
 |
| Collar will no longer lay flat on table |
|
Matching Center Backs, Baste Collar to Neckband. Upper Collar is facing up.
Stitch center back seam of neckband. Press open. Trim.
Match center back seam of neckband to center of upper collar. Pin edges together, stitch, trim. Press right side out.
 |
| View of upper collar and portion of neckband that will touch neck. |
Attach collar/neckband unit to shirt neck. Stitch, clip, and press seam allowances up to neckband.
Turn down inside neckband edges on inside of garment, and pin in place. Topstitch all sides of neckband from right side of garment.
Continue to Part Three


No comments:
Post a Comment