This tutorial is written for advanced sewers though other levels will find the information useful and entertaining. The tutorial will be updated regularly with the dress scheduled to be completed by the end of July 2012.
This pattern appears in the 2012/13 issue of Marfy Italian Fashion Design. You can purchase the pattern catalog at
voguepatterns.mccall.com/catalogs-pages-1463.php.
Many Marfy patterns are available for purchase at the voguepatterns.com website, however this one is not. You can purchase the pattern on the Marfy website (marfy.it) with this link:
http://www.marfy.it/eng/activenews.asp?idcat=&idart=67777&azione=list&layout=&CID=A151L156L220120627184512WRBWRYEVVOI08567752. If the link doesn't work, search the marfy.it website. Sometimes I purchase Marfy patterns that are not available for sale on the voguepatterns.com website nor the marfy.it website. I send a fax to Marfy in Italy with the pattern number, size, my name, address, credit card number and expiration. The fax number is 0532 752.390.
I love working with Marfy patterns because the designs are straight
off the couture runway and the patterns are extremely well drafted. The
patterns have clever curves that flatter the wearer and elevate the
design beyond normal commercial patterns (Vogue, McCalls etc.). Sizing
is couture meaning you probably will buy a larger size than normal. For
example, in Marfy a 36" bust requires a size 44 pattern. In Burda you
would be a size 40 and in Vogue you would be a size 14.
Marfy
patterns are printed on white tissue paper and have a few notches and
grain line markings, and no seam and hem allowances. It is easy to
trace the pattern directly onto muslin and then add seam and hem
allowances with a ruler. Also mark grain line on each muslin panel to
assist you in checking fit.
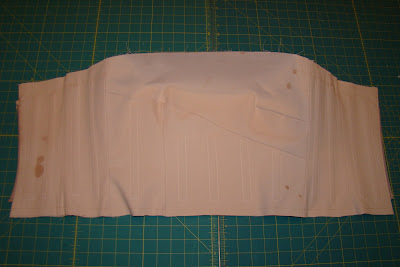
Once you have perfected the fit of the muslin, you can calculate the fabric yardage required. Here is the assembled muslin:
 |
| Marfy 2845 made in muslin for fit correction |
This pattern has pieces with interesting shapes that overlay in an unusual manner. To figure out the pattern, I first pinned the pattern tissue together. Then I was able to mark and baste a muslin together.
Next I created the inner corset pattern. I took the bodice corset pieces provided with the pattern and lengthened them so the corset will extend 2.5" past my waist. The additional length will be boned and will help pull my abdomen in. Here is the inner corset muslin:
 |
| Marfy 2845 inner corset |
To create this cocktail dress, I need the following supplies:
1. Metallic animal print brocade (rayon, silk, cotton blend), 2 yards 60" wide fabric for size 44
2. Silk organza, 2.5 yards 54" wide
3. Coutil for the inner corset, 1 yard 60"
4. Silk habotai and silk charmeuse for the lining
5. Contrast fabric for the neckline strap
6. Notions: regular zipper, 1/2" steel boning, 3/4" boning casings, 1" grosgrain ribbon, thread.
After you have fit corrected the muslin, disassemble the inner corset pattern as show below.
 |
| Inner corset pattern pieces |
Cut two of each corset pattern piece out of coutil. Stitch boning channels on side that will be against your body. Seam and press.
 |
| Foundation corset layers |
|
Clip seam allowances to curves lay smoothly. Set these panels aside.
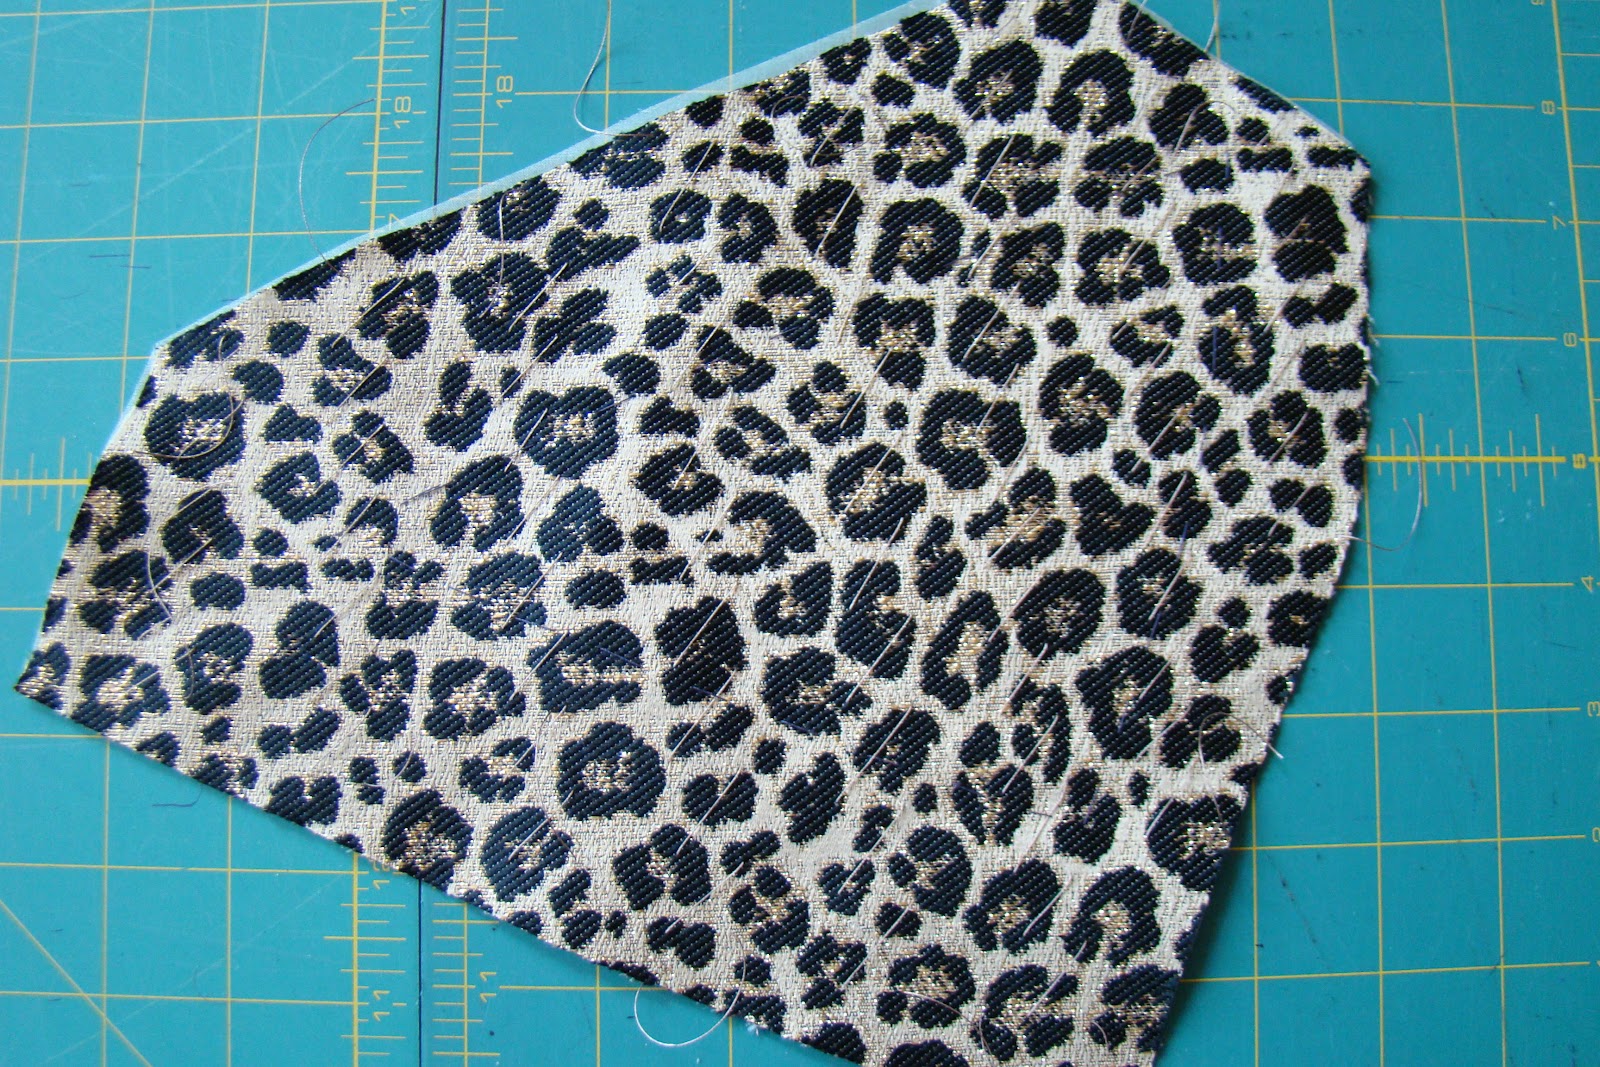
Fashion fabric work:
Identify the pattern pieces:
 |
| Upper Bodice One-cut 1 |
|
 |
| Upper Bodice Two-cut 1 | | | | | | |
|
 |
| Lower Bodice One-cut 1 |
|
 |
| Lower Bodice Two-cut 1 |
|
 |
| Skirt Front-cut 1 |
|
 |
| Dress Back-cut 2 |
|
 |
| Hip Inset-cut 1 |
|
Cut these panels out of both fashion fabric and silk organza. Mark stitching and design lines on silk organza with tracing paper. Then diagonal baste the layers together. Here is a closeup view:
 |
| Hip Inset - diagonal basting |
|
 |
| Thread tracing and diagonal basting on Skirt Front |
|
Stitch darts in bodice panels. Press to center.
Catch stitch hem on Upper Bodice Two. Fell stitch lining to this panel. Consider using self fabric to line because decorative fold will cause lining to show. The wide side of this panel needs to be hemmed as well; I discovered that fact after this photo was taken!
 |
| catch stitch hem on upper edge of panel |
|
Baste lower edges together and baste fold through all layers. Only the lower edges and left side of this photo are raw edges at this point.
Baste Upper Bodice Two on top of Lower Bodice One. Be sure the dart on Lower Bodice One has been cut open, pressed, trimmed down and hand overcast to the silk organza.
 |
| Upper bodices joined |
|
Stitch upper bodices to Lower Bodice Two.
 |
| Lower Bodice Two added |
|
|
|
|
|
|
|
|
|
|
|
Press seam open, clip and hand overcast seam allowances to silk organza invisibly.
 |
| seam prior to clipping and overcasting |
|
|
|
|
|
|
|
Prepare Upper Bodice One by turning top and bottom allowances to inside and overcasting in place.
 |
| Upper Bodice One is unlined |
|
Turn lower pleat down and overcast in place.
 |
| Upper Bodice One is neatly finished on the upper and lower edges; side edges will be caught in side seams |
|
|
|
|
 |
| Upper Bodice One hand overcasting at pleat |
|
Set the Upper Bodice One panel aside for when the skirt front is assembled.
Skirt Assembly:
Pins show placement of hip inset.
 |
| skirt front pattern muslin |
|
Lay Hip Inset in place with seam allowance folded under.
Stitch 1" from fold.
Pleat depth is approximately 1".
 |
| Do not press lower fold of inset; this edge should remain soft. |
|
|
|
|
|
|
|
|
|
|
|
Fold down top pleat; do not press. Pin in place.
Stitch top pleat in place on inside. The skirt pleats will all look
like soft folds but they are securely held in place and will not open
much.
Lay fabric in middle fold which will cover top of Hip Inset.
Stitch middle fold in place. Press open dart and trim down below waist seam.
Dart will be opened and overcast in place after skirt front is attached to bodice front.
Join bodice unit to skirt front at waist seam. Press waist seam open, clip and overcast in place. The dress looks thick in the waist in the below photo because the dress has no center back zipper yet.
 |
| finally the panels are starting to look like something! |
|
|
|
|
|
|
|
|
Lay Upper Bodice One Overlay in place, covering waist seam. Baste at side seams.
Stitch dress front to dress back at side seams. Overcast seam allowance edges.
Stitch darts in dress back panels; press to center back. Machine stitch center back seam from hem to zipper stop. Press open. These edges will be overcast after the zipper is installed.
Install lapped zipper by hand.
 |
| zipper at center back |
Cut and stitch lining seams and darts for the dress and inner corset. Since your design is not symmetrical you will use the pattern pieces right side down facing the right side of the lining. Baste dress lining into dress at top edge and fell stitch to zipper tape.
 |
| lining hand stitched to zipper tape |
Mark hem on dress but do not press hem fold. As an attractive option you can make center back 1/4" - 1/2" longer than center front, blending at the side seams.
I padded the hem for a couture finish. Cut batting (Warm and Natural cotton batting) into a strip 4" x 45". Pick stitch the batting along the marked hemline with 3/4" of batting extending into the hem allowance. The pick stitch is permanent and will be nearly invisible on the right side. Catch stitch the top of the batting to the organza.
Cut lining 1/2" longer than finished length of dress. Press under 1/2". Fell to hem allowance. Press down to create 1/2" ease pleat.
Turn in center back edges of corset and catch stitch in place. You have two corsets: one with boning and one without. Therefore you are catch stitching four center backedges. The corset with boning will be the side that sits next to your body.
Lay the two coutil corset layers wrong sides together. Stitch a zipper between the two layers leaving room for a hook and eye at the top. Baste top and bottom edges together. Please excuse the water marks from the iron in this photo.
 |
| front of two layer corset |
 |
| back of two layer corset has a zipper |
Mark the waist on the boned side of the corset. Stitch a grosgrain belt to the corset through all layers.
Lay corset lining on top of boned side of coutil. Mark location for buttonholes that will allow grosgrain belt to exit lining. Sew buttonholes. Baste lower edge of lining in place.
Pick stitch corset to dress along top edge aligning zippers.
Pin top edge to inside and catch stitch in place. A double layer of coutil creates a firm foundation. Look how this dress lays on the ironing board!
I added hanging loops at this point because the lining is in place and I can stitch the loops to both the lining and coutil without disturbing the fabric layers.
Bind lower edge of corset with lining.
Add hook and eye to top of dress. Fell corset lining in place along top edge.
Remove diagonal basting stitches and give dress a final press. Be sure to not press the hem flat. Another fun dress finished!
Thanks for reviewing this tutorial!


This dress is stunning. This is the Marfy pattern that I would like to try. Now that you have shown me how, I am really interested in it. Natural tones for Ann. It looks great.
ReplyDeleteWhat a beautiful dress! I can't believe that I bought the same fabric form Gorgeous Fabrics! I was planning a trench coat but now that you've shown me how well it folds and pleats, that may change. Thanks for the detailed tutorial!
ReplyDeleteWauw I love that dress, and such a big work you made!!!
ReplyDeleteYou look amazing! I am wondering how you think full bust adjustments would work with Marfy patterns? Do you think the designs are any more or less difficult - or the same - as the average patterns? This dress is so flattering on you! I always need a FBA, and shorten the back length to make things fit - causes all kinds of design and fitting nightmares. Love the dress - what's next? :)
ReplyDeleteI have just found your blog, after ordering my very first Marfy pattern from Italy.
ReplyDeleteSo thrilled as in my very early retirement I returned to my love of sewing and make each project one that will challenge me. I work mainly with silk as the feel of it cannot be beaten!! I am particularly thrilled to have seen in our projects how you hide the stay belt; I am finishing of an evening dress I am making for my teenage daughter and its the first time I have made a belt..............and the first boned bodice too. Thank you so much for sharing your expertise. Much appreciated. Kindest regards, Marysia. AKA Smockerlady.
Ann,
ReplyDeleteI wonder if you would be kind and tell us how you measure for your waist stay. I have seen blogs where they aren't hidden like yours ( your technique is beautifully neat). I am confused though as others only catch the stay in a few places and make it a very snug fit.
I would love to hear how you actually do your version.
Your work is just stunning. Thank you for posting these tutorials! I have a question about pretreating the coutil. I'm assuming this garment is dry clean only, so did you dry clean your fabrics before constructing your dress? I've been reading about coutil in various blogs and some suggest washing it before working with it. What do you recommend? I plan to use coutil in a dry clean only dress so I'm just trying to figure out the best pretreatment route.
ReplyDeleteThanks!