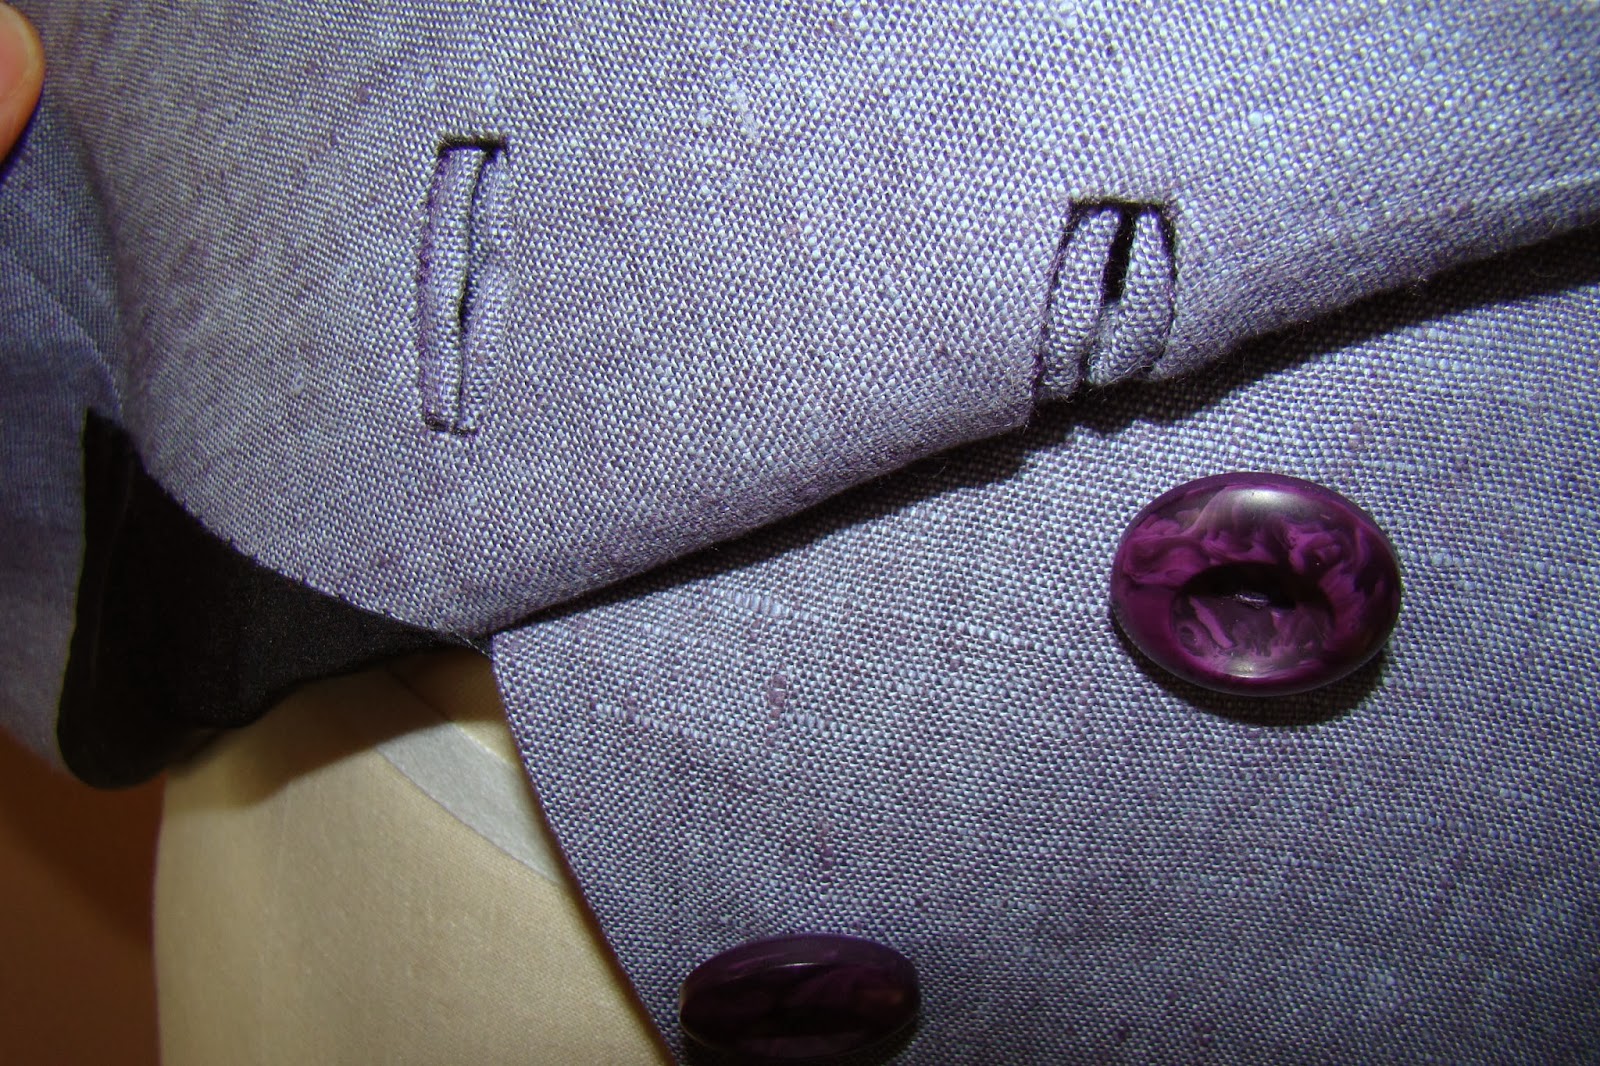
I've been talking with friends about the bound buttonholes featured on the jackets in the December 18 post 'Jacket Interfacing'. There are many good methods for sewing bound buttonholes, and this post discusses my favorite construction method. The samples are done with linen fabric. If you use wool, the fabric has a built-in flexibility that will improve the quality of your buttonholes. Linen is thin and perhaps a little less forgiving. For all fabrics, press after each step with an organza press cloth to prevent scorch or shine on the fashion fabric. If you end up with over-pressed buttonholes, use a soft brush to raise the nap and diminish the shine. Thin welts can look more expensive than thick welts; these welts are each 1/8" wide. The thick button is 1" wide. The finished buttonhole is 1/4" by 1 1/4".
Sewing Instructions: Cut a strip of fabric 1 1/2" x 20". This sample is cut on the lengthwise grain, but I typically use the bias grain. The jackets in the December 18 post were cut on the bias to make welts with interesting diagonal lines. Fuse interfacing to the fabric strip. Fold strip in half, wrong sides together. Do not press. Machine baste 1/8" from the folded edge.
Trim the strip down so the basting line is in the middle of the strip. The strip is now 1/4" x 20".
Machine baste the buttonhole locations on the face of the garment. It is not necessary to use contrast thread color.
Fuse a patch of interfacing to the wrong side of the garment, under the marked buttonhole locations. This purple linen top is underlined in white silk organza, so the interfacing is placed directly on the fashion fabric. I apply fusible interfacing to all panels of a wool jacket so this step is not usually necessary.
We're back to the fashion side of the fabric. If your basting is crooked or uneven, redo it. The finished buttonholes will be as accurate as your basting.
Pin two 2" x 1/4" welt strips with raw edges on the horizontal buttonhole basting line. There should be no space between the raw edges (there appear to be spaces on the sample below only because the sample has been handled frequently). Machine stitch the welts to the outside of the garment along the machine basting lines with a 2.0 stitch length. Stitch exactly between the two vertical lines, not past them or short of them. The two rows of stitching must match exactly in length.
View of stitching from the wrong side of the garment. Note the back stitching at the start and finish of each welt. The two parallel rows are 1/4" apart.
Without cutting the welts at all, cut down the middle between the two stitching lines, aiming for the stitching lines the last 1/4". In the photo below the center cut is 3/4" long. You must cut all the way to the four corners. Avoid the temptation to cut 1/8" short of the corners.
Push the welts to the inside of the garment and press into an accurate rectangular shape. Hand baste the folded edges of the welts together. The folded edges abut rather than overlap. From the right side, lift the fabric edge to expose the triangular seam allowance. Stitch it to the two welts. The stitching follows the left-most white fold of fabric in my hand. You marked this stitching line in the beginning with two rows of vertical stitches.
View from the wrong side. The folded welt edges are not basted together in this photo but yours could be.
View from the outside. Remove horizontal and vertical machine basting. I leave the two welts hand-basted together until the final garment pressing.
Now we need to finish the inside of the garment and buttonhole. Lay the buttonhole side of the garment in place on top of the button side. Place pins in the four corners of the buttonhole. Mark these pin locations on the right side of the under layer.
Lay a scrap of fusible interfacing glue side up over the marked under layer. Stitch all four sides of the rectangle. My rectangle is a little wide on the right side; it should be redone. Use a 2.0 stitch length.
Cut down the middle of the rectangle and angle to the four corners. Push the interfacing scrap to the inside.
This is the view from the right side.
Trim and pink the interfacing edges, then press in place. Your interfacing should be neater than mine, maybe 3/8" wide on each side.
Hand sew the under layer to the back of the bound buttonhole.
Sometimes I omit the interfacing scrap and just cut the under layer along the rectangle and hand stitch the edges in place. The interfacing scrap holds the narrow allowances in place without adding much bulk so I usually follow that step.
The last and easiest step is to sew the buttons on! Be sure to sew the buttons on loosely so there is room for the buttonhole layer under the button.


Hi there Ann,
ReplyDeleteIts New Years Day here in the U.K. and I am popping by to say, thank you so much for the wonderful New Years gift from you................this tutorial on how to achieve bound buttonholes as beautiful as those worked on your gorgeous blazers!!
Thank you so much for all the time and effort you put into this and your blog.
Can't wait to get to this stage on my Marfy dress. Fingers and toes crossed that I do your buttonholes justice.
Warmest regards,
Marysia