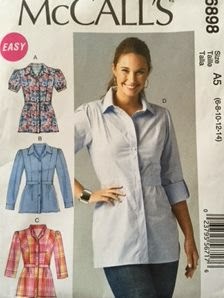
Below is the pattern I plan to use. What do you think of the collar fit on the model? It is not flattering at all. In addition to the looseness around the neck, the collar itself is large. Compare the pattern collar width to the above photo and note the size differential.
Below is method 2. Lay the shirt flat and measure from center front to center front. Again the measurement is 15.5".
Next I measure the collar itself. The collar measures 2" from finished edge to neckband seam.
Now to correct my pattern tissue. Lay the front (piece #2) and back (piece #7) patterns on the table.
 |
| Bodice Front is on left side, Bodice Back is on right side of photo |
Lay tracing paper on top of the pattern tissue. Trace the size 8 cutting lines onto the tracing paper. Note that size 14 is the largest size on this particular pattern tissue.
Lay the traced size 8 neckline on the size 14 cutting lines, aligning the shoulder seam and the neck edge. The change is subtle: the center front neckline rises 3/8" and blends to nothing at the neck/shoulder edge. There is no change to the shoulder seam nor the armhole.
Repeat the step for the back neck.
To reduce the size of the collar, make a photocopy of the collar pattern piece. Below you see a red pen line 3/4" above the outside edge of the collar. This will be the new cutting line for the collar. My collar now is 2" wide with a 5/8" seam allowance at the neck edge, and a 5/8" seam allowance along the outside edges.
If your pattern tissue does not have the size you need marked on it, try to "grade" the pattern yourself. This is a relatively simple exercise in grading a pattern, so give it a try. If you work off of a photocopy rather than the original pattern tissue, you can redo until you have it right.


I am anxious to see the results. Thanks for your explanation of this technique.
ReplyDeleteIt's interesting how simple details can improve a garment dramatically. Fortunately changes to neckline size can be done by people at all sewing levels.
ReplyDeletePriceless info, I just made a couple of shirts where I thought the neckline was weird! This is the fix!
ReplyDeleteIt took a bad photo on the pattern jacket for me to discover this "fit opportunity." Let me know how your next shirt fits.
ReplyDelete