Friday, May 25, 2012

What can you do with a Basic T-shirt Pattern?

Sewing Level:  Easy

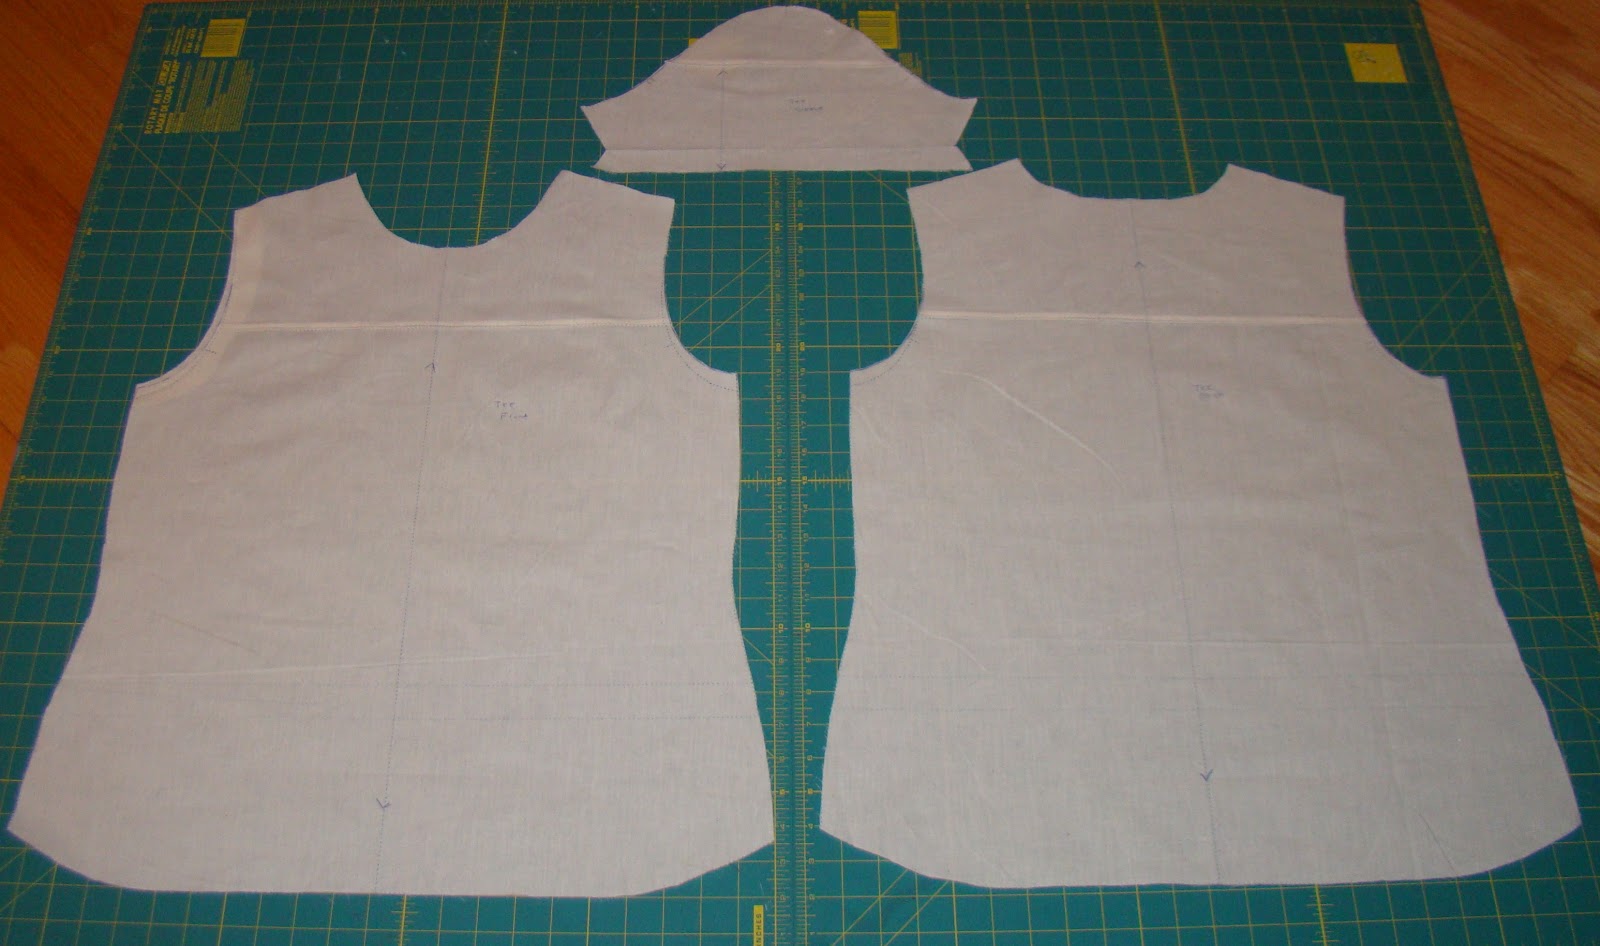
Sometimes a sewing project should be easy and creative.  Start with a basic T-shirt pattern:  a front cut on a fold, a back cut on a fold, and an optional sleeve.  I used pattern #104 from pamelaspatterns.com, but feel free to use any patten you think will fit well.

 If you want a very fitted T-shirt, choose one size smaller than your bust measurement.  Use cotton/spandex for a firm, fitted look.

For these sample garments I am using rayon/spandex knits that drape and change shape easily.  They do not hold a firm shape so I chose the pattern size that would cut a garment one inch larger than my bust measurement.

The first sample is a khaki rayon/spandex knit.  The garment is plain but definitely useful in a wardrobe.


The second sample is the same pattern in a more interesting fabric:  metallic gray/silver rayon/spandex knit.  The metallic knit top might overpower a casual outfit if I over embellish, so I'll just add a center back panel that is longer and narrow than the pattern back piece.  The extra length will allow the back to blouson and move away from the body.

This is the same knit used in the 1936 vintage halter dress posted on 5/3/12.


The back panel was sewn to the garment back at the neck and shoulders, then the two layers are caught in the shoulder seams and neck binding.  The back panel was twisted six times and then joined to the tee at the hem.  A simple technique and the garment becomes interesting yet still wearable.  I'd love to see the panel cut in chiffon and added to the back of a dress.


The third sample is a red bamboo/spandex knit.  Note how the armholes and back shoulder seam allowances have 1/2" fusible interfacing applied in the seam allowance on the wrong sides.  I interface all knit garments in this manner.  The interfacing controls the size and stretch of the armholes and shoulder seams.  The neckline seam allowance is not interfaced because a neckband will control the neckline shape.


A second front panel is cut with a V neckline and angled front hem.  The neck and hem of this layer will be left as raw cut edges.  The shoulders, armholes and side seams will be joined in to the garment seams.


I have slashed the second front panel with a rotary cutter against a ruler.  The slashes are 1" apart.  Choose any pattern for your slash marks.  You don't know what the result will be, so you are taking a risk here.  Horizontal rows down center front would be an attractive alternative.


The finished garment is fun to wear and so fast to sew.  I would try this cutting technique on the back panel of the silver tee above for fun.  The possibilities are endless and this is a quick way to decrease the size of your fabric stash!

Thursday, May 17, 2012

Shirtdress


Sewing Level:  Easy

I'm not sure this project was entirely successful.  My goal was to create an interesting shirt dress.  I absolutely loved the style when it was tested in muslin.

To be efficient I cut two dresses:  the first in red cotton oxford cloth.


The second in white cotton broadcloth with red pinstripes, the skirt overlaid with sheer red lace.


The workmanship is fine and I like the clean lines of the dress fronts for day wear.  It's the backs with the rows of gathers that I am uncomfortable with.  The long hem is good but the gathered panels seem overly fussy or feminine. 


I wish I had overlaid the side back panels with red lace. 


The fronts have nice details such as hidden buttonholes with embroidery to hold the front bands in place.


I guess the lesson is that not all garments will be successful, even when you follow an orderly process to test the design, fabric, and color choices. 

Maybe rolling up the sleeves and pairing the dresses with cute summer shoes will help.

Monday, May 7, 2012

Beaded Travel Jacket


 Sewing Level:  Intermediate


This jacket is wonderful because it is both functional and stylish.  Function comes from the four pockets hidden inside the jacket and the center front zipper closure.  Style is black beaded lace lined and underlined with nude silk broadcloth.  I purchased the lace fabric years ago while visiting Denver.  The jacket pattern is the Flounce about Jacket from saf-t-pockets.com, a pattern company that specializes in travel garments. 

The jacket packs well; an underlining minimizes wrinkles.  You could wear this jacket with both jeans or trousers, depending on your taste. 

The lace is embroidered with 3" long sequin chains which move when you walk which is fun if you like attention.

The jacket won Honorable Mention in the 2012 Midnight Magic Competition sponsored by the Independent Pattern Company Alliance.


This is a view of the inside of the garment.  Two pockets hang from each front waist band, and the peplum skirt hides the bulk stored in the pockets.


Additional photos


Zero Waste Evening Gown

Sewing Level:  Easy

Do you ever feel guilty throwing fabric scraps away?  It is possible to design beautiful clothing that uses the entire fabric yardage without creating scraps; it is called zero waste design.  I created this blue gown from nine yards of 44" wide silk chiffon without removing selvage edges or creating scraps.  The fit is flexible and very comfortable.  If you can cut rectangles and triangles, fold them and stitch them together, you can design and sew this gown. 

To create the bodice, take a 36" long panel of fabric, and fold it both across the width and the length, making a 18" x 44" box.  One fold is center front, the other fold is part of the collar.  Remove triangles of fabric to open armholes and provide fabric for a collar.  Cut a second bodice to serve as lining.  Join the bodice to the lining at the armholes, turn and press.

 
To create the three tier skirt, determine the three finished lengths.  If the longest tier is 40", the panel needs to be 82" long:  (40" finished length + 1" seam allowance at waist) x 2. The second tier has a 35" finished length so the panel needs to be 72" long (35+1) x 2. The top tier has a 24" finished length so the panel is 50" long (24+1) x 2. Fold each panel and seam the selvage edges; then join to bodice at waist, insert elastic, and you are done.

If this doesn't sound easy but you like the dress, the pattern and illustrated cutting and sewing instructions will be posted on this website in June so please check back.  

Thursday, May 3, 2012

1936 Gown and Faux Fur Coat

Sewing Level:  Easy 

This gown was a winning entry in the EvaDress.com 2012 vintage sewing competition.  Both the gown and coat can be made by a beginning sewer because there are few pattern pieces and the fabrics you choose really carry the design.


The halter gown is made from a gray metallic rayon/spandex knit.  Rayon knits drape and sew well, and the spandex helps the garment recover from stretching and movement.  There is a skirt front, skirt back, armhole band, and center back band. I used fusi-knit interfacing on the armhole (2) and center back (2) bands to discourage the edges from rolling and curling over.  The skirt pattern does not call for a lining.  I was concerned the garment would outline my lower body a little too much so I lined the skirt with the same rayon knit, using the skirt front and back pieces.
The coat is a simple boxy style:  two jacket fronts, jacket back on a fold, two sleeves, collar and lapels.  The faux fur is long pile meaning the hairs are longer than 1/2" (this fur's pile is 2 1/2" long).  I applied fusi knit interfacing to the jacket lining pieces (except sleeves) to help support the shape of the coat.  In a future post I will demonstrate working with faux fur because it's fun to work with and the results are dramatic.
See why I wanted to line the skirt!  Stitch a rayon knit with a narrow zigzag stitch; your stitch must have stretch or else the threads will break when you pull the garment on.  If you have a serger, a four thread medium width overlock stitch is fine.  Apply Steam a Seam fusible tape to the hem area prior to topstitching to avoid stretching the hem.
I plan to dress down this gown on summer weekends with beaded flat sandals for outings to the beach and casual outdoor parties.  I would rather go to an event a little over dressed than let the garments I sew all sit in the closet waiting for special events that may never occur.  Sewing your own clothes is fun!

Wednesday, May 2, 2012

Fantasia Jacket #518 by Kayla Kennington patterns (kaylakennington.com)

Sewing Level:  Intermediate

This jacket is made from rectangles, triangles and squares rather than familiar bodice pattern pieces. The rectangles form the body panels, and the triangles create fullness below the waist.  The squares trim the cuffs.   I used a sheer voile made of 30% silk 70% cotton, purchased from thaisilks.com.  The pattern instructions include Kayla's unique seaming technique using a threee-thread rolled-hem edge done on a serger and connected with a zig-zag stitch.  You need to add 1/4" seam allowances to the 25 pattern pieces when cutting out.  Label each piece as you cut to avoid confusing them.  If you don't have access to a serger, the garment can be sewn on a regular sewing machine.  A very fun project to sew. 

You can add a triangular godet to any garment that has vertical seams.  The hem edges of the godet should be cut on the bias for maximum soft draping. 
The back features a longer three layer godet that implies a bustle or a long tail coat.  I would wear this blouse with black denim jeans or a pencil skirt.