Showing posts with label Vintage Designs. Show all posts

Friday, January 30, 2015

A Navy Skirt with a Train for Day


Burda Style 9/2014 #105


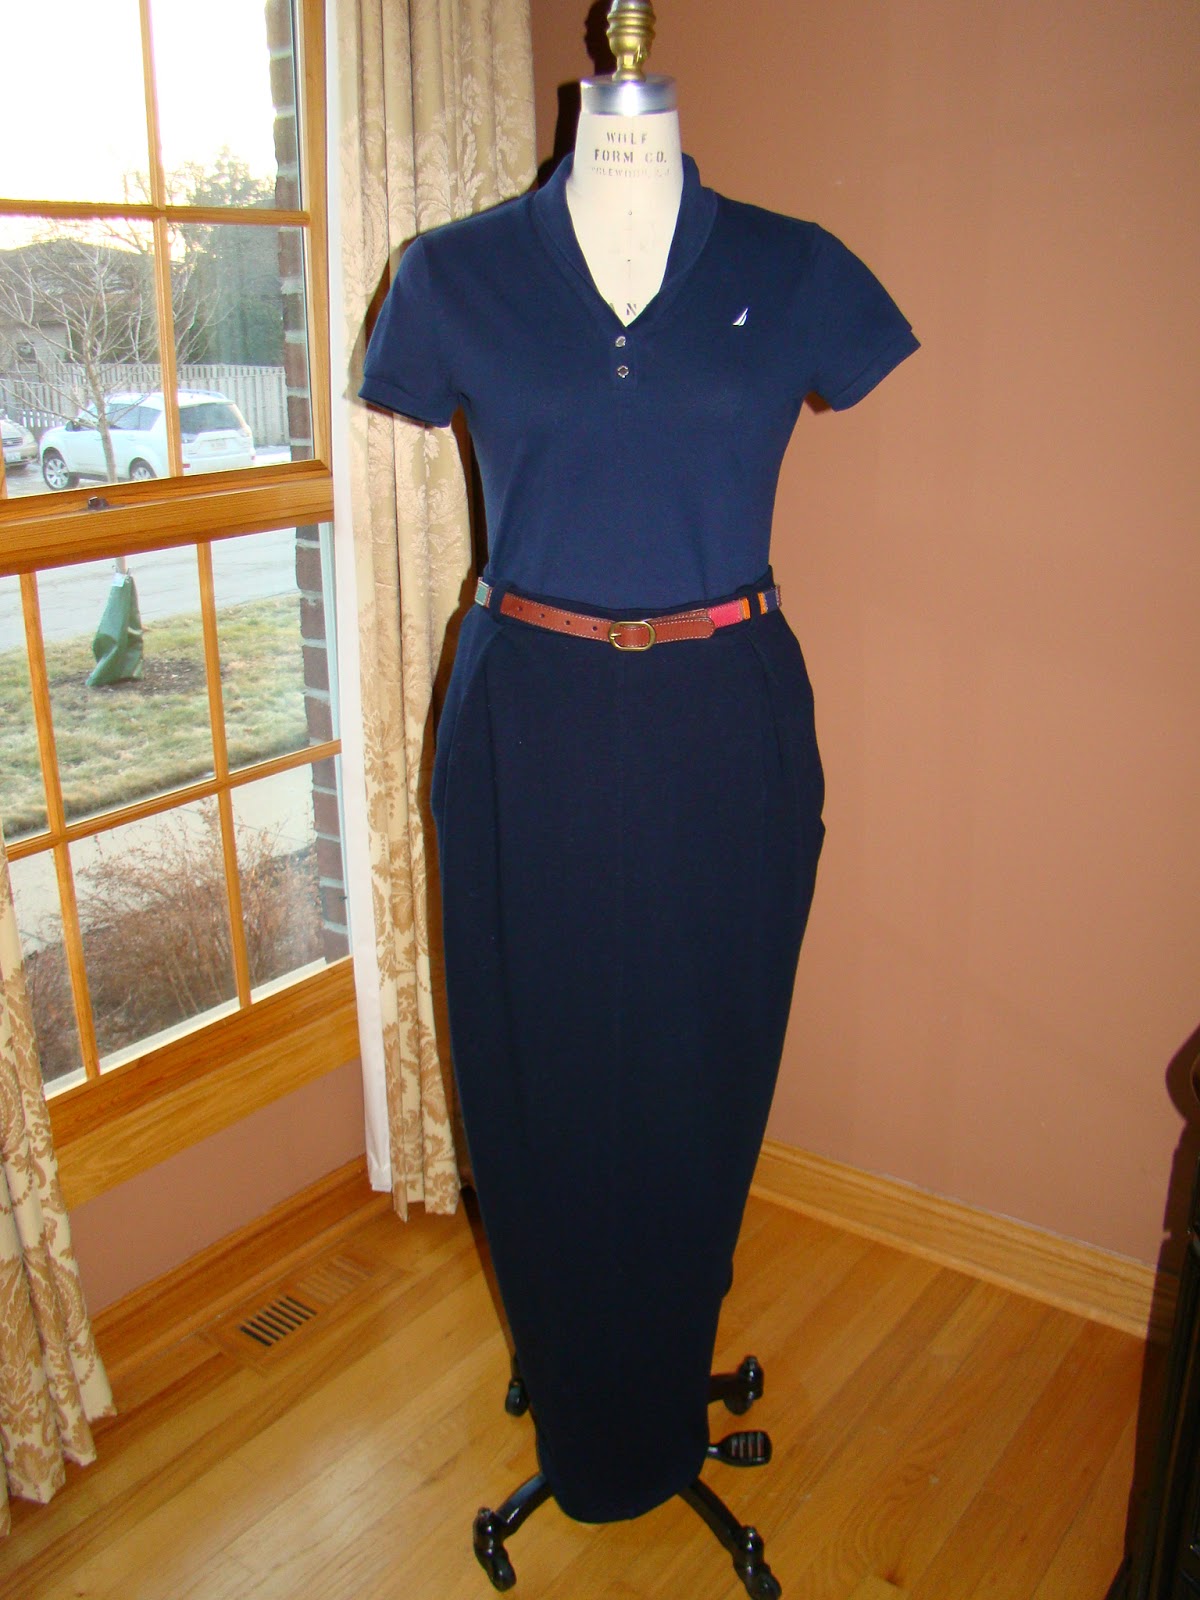
I fell in love with this outfit because it's a novel interpretation of day wear.  A blouse, sweater, skirt, and athletic shoes.  The outfit is clearly casual yet the skirt has a train!  This is my definition of play clothes.  I had navy cotton/spandex heavyweight jersey in my stash (purchased from Mood Fabrics NYC last year).  The fabric is similar to a sweatshirt.  Here is my reinterpretation of the Burda ensemble:
Burda 105 9/2014 with purchased polo top
I think I achieved a casual vibe and the skirt is a good weight for winter.  It can be uncomfortable to wear a knee-length skirt during winter, but floor length is similar to wearing trousers.
From the front, the train is not visible
The front hem is a couple inches off the ground, and I plan to wear "nice athletic soled" shoes with the outfit.  I don't want to sweep the floors and streets with the train so I added a button and loop bustle which I have never seen on a day wear garment.  I can bustle the skirt to keep it clean.
Front view with skirt back bustled
Back view bustled
A 1/8" wide black elastic cord was inserted in the center back seam.
The elastic loop is placed a few inches below the bottom of the center back zipper.
Elastic loop
The skirt is made from a heavyweight knit.  Therefore the bustled fabric pulls down or drags the back waistband down a bit.  The skirt feels great on, and wearing a belt should keep the waistband in place.


I added the boucle jacket, unfastened, from the 1/19/15 post; it looks good.  This outfit can be dressed up easily (no kidding, it has a train!)
The pattern contains two pieces plus waistband.  There is a seam at center front, no side seams, side back seams, and a center back seam.  Below left is the front panel.  Below right is the center back panel.  I cut two of each.
All the large pattern lines sell skirt with train patterns, so you do not need the pattern I used.  This should be fun to wear, and of course, comfortable.

Friday, December 5, 2014

New Fur Hat

My stash includes a few yards of black/wine faux fur.  For a quick and easy project, I decided to create a hat that matched one of my favorite coats.  I love the drama that faux fur accessories and trims add to a garment.
Construction of the coat was discussed in the 1/13/14 post Wide Bands of Fur on a Winter Coat.  Below is a photo of the coat.
'Wide Bands of Fur on a Winter Coat' 1/13/14 post
While the coat has a hood, my reasoning for adding a hat is (1) a hat is warmer, and (2) I need to use the fur scraps to reduce my stash.  The interior of the hat shows how simple it is to construct this hat:
Grosgrain band covers raw seam allowance edges
Butterick 3055 is an old pattern in my stash.  None of the hats in the pattern were exactly what I wanted, but it is easy to modify them.
I used the Top from View L and the Crown from View E
The pattern pieces are a round top that sits on top of the head and a crown that wraps around the head and attaches to the top.  Cut one of each pattern piece from both fashion fabric and lining.  I did not interface the hat because the fur backing is quite firm.  Woolens and other fabrics would benefit from interfacing.  The lining is stretch silk charmeuse. 
Two pattern pieces: so simple to cut from fashion fabric and lining
As with garment sewing, I created a few hat muslins to get the look I wanted.  The photo below shows the original tissue for the crown and the modified crown pattern I made. The fold is placed at center front, and the angled seam is placed at center back.
The Crown was reshaped to curve around the head
My crown pattern is curved to fit an enlarged top piece.  If I didn't curve the crown, I would have sharply angled seam lines at center back which would not have fit the head properly.

I know many sewers have taken professional millinery classes so they can construct ornate hats.  My passion is garment sewing and while I would enjoy having fine millinery skills, I do not want to divert much time away from garment sewing.  Simple hats are a quick project for sewers of all levels.  This hat could easily be embellished with a feather or jeweled pin. 

Tuesday, November 25, 2014

Rhonda's Plaid Skirt

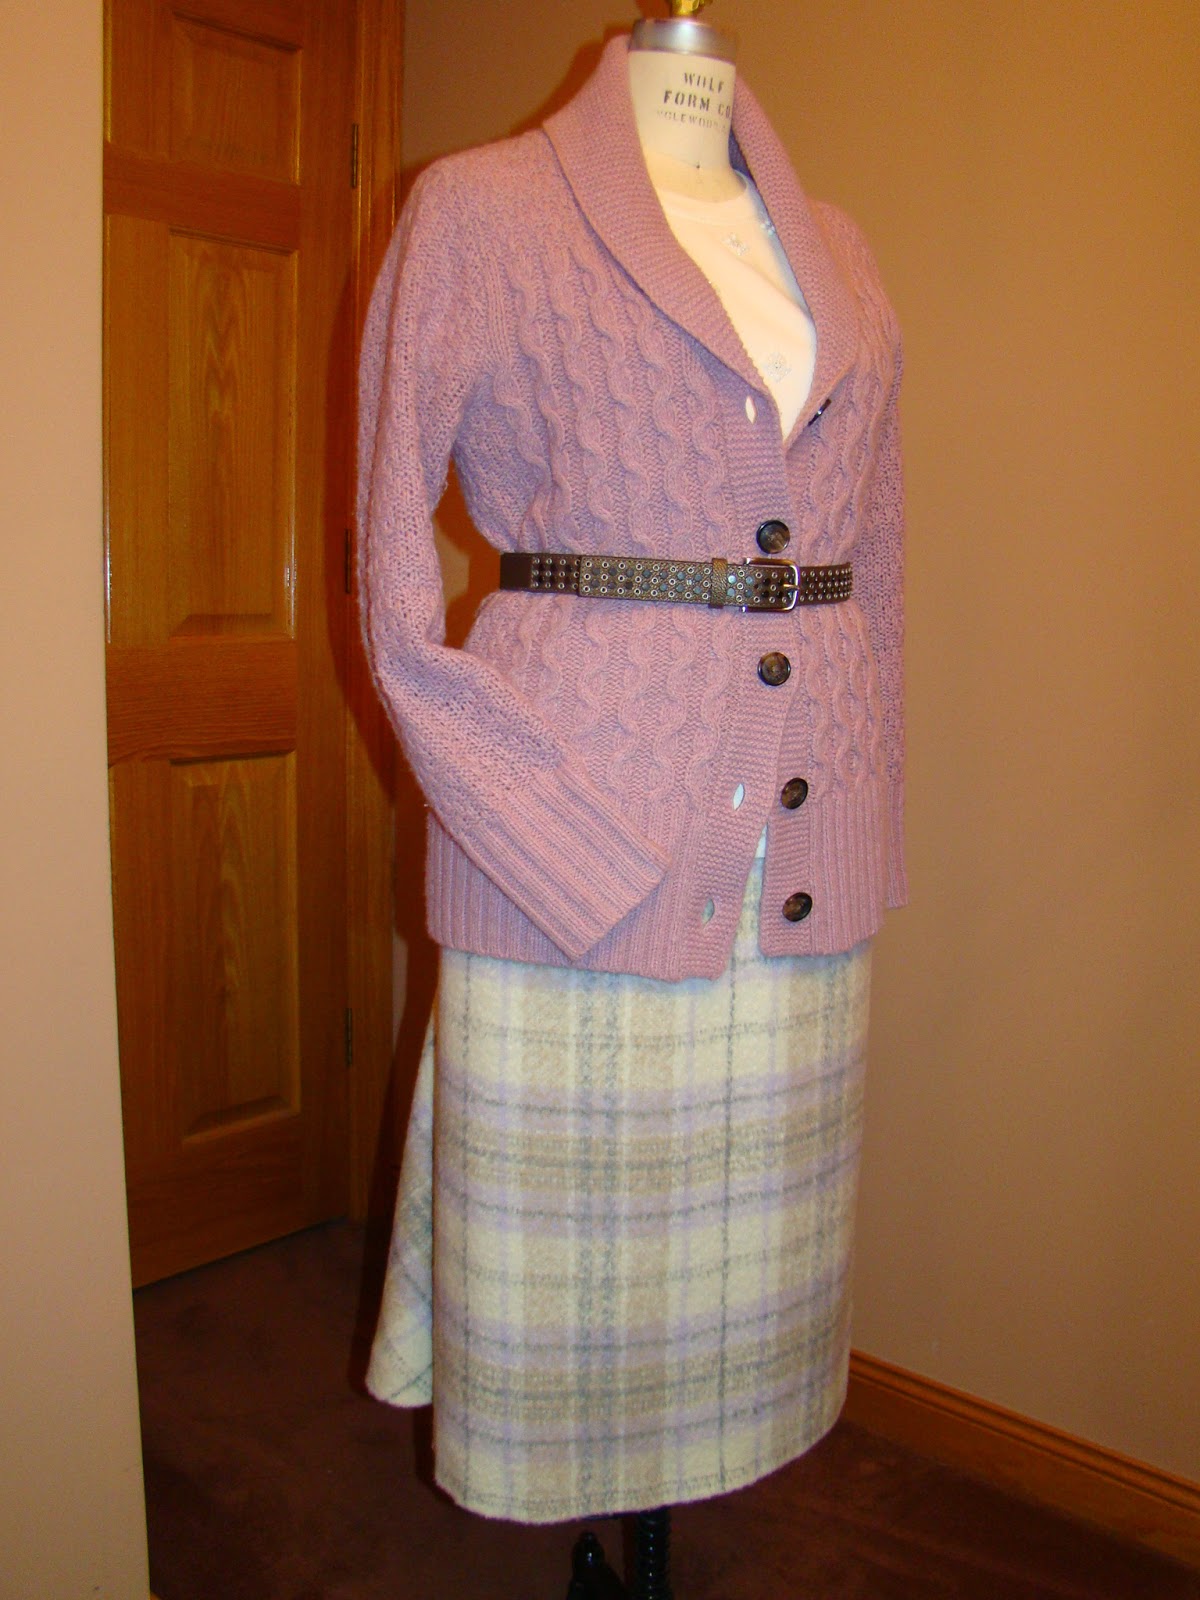
I am a regular reader of Rhonda's Creative Life, a sewing and fashion blog.  The Wednesday, November 19, 2014 post Drafting the Raised Waist Skirt with a Back Flounce inspired me to create a quick plaid wool skirt.  Rhonda's Creative Life features the directions for drafting the skirt pattern as well as interesting photos of plaid garment designs.  Here is my version of the plaid skirt:
Flounce Skirt styled with multiple sweaters for Chicago winter weather
The wool plaid is heavyweight, with a "fuzzy" surface texture.
Side view
The flounce volume is attractive without being excessively full.
Back View
Next up are fur cap and sweater coat projects.  Happy Thanksgiving!

Friday, October 18, 2013

What is a Fur Pelerine?

Burda calls this fur mini-cape a pelerine.  The dictionary lists pelerine as a french word for narrow fur cape; the word has been used since 1744. I just know I like it!
photo from the October 2013 issue of Burda Style
The pelerine takes the above sweater/trouser outfit from nice to outstanding.  I could see the pelerine over a winter coat, or as a winter coat in warmer climates.  Here is my version, made from the above pattern:
Ann's pelerine
Not bad for an evening of sewing.  I used the same brown/black faux mink in my 12/14/12 post Detachable Faux Fur Collar.  Here is the pelerine over a gray beaded sweatshirt and white button down shirt.  I could add jeans or slim trousers to complete the look.
Pelerine over sweatshirt and white blouse
The pelerine perks up this gray wool winter coat and adds warmth over the chest which is where I need it since I live in Chicago.
Pelerine over gray wool/lace winter coat
Here are a few construction details:

Take any cape pattern, and shorten it to just below the bust line.
Make a mini-cape muslin
Lay the pattern on the wrong side of the faux fur, with the fibers running down the garment (with nap layout).
Cut fur from wrong side
Cut through the backing only, leaving the long hair fibers alone.  Below you see the fibers extend beyond the backing at an angle.
Cut backing only, not fur hairs
Remove the fur within the seam allowances.  This will make your seam allowances less bulky and more invisible.
1/2" seam allowances have been trimmed
Hand catch stitch the seam allowances to the backing material.  This will hold the seams open.  Never press faux fur!
Catch stitch seam allowances flat; there are only two!
Catch stitching is quick and look at the nice result.
Side seams are nearly invisible
I lined the pelerine with black rayon/lycra knit from my scrap box.  I applied fusi-knit interfacing to the lining to make it lay firm and wrinkle-free inside the cape.
The finished project
If you have a chunky sweater knit, try making a pelerine from that.  I'd also like to try a bright color fur, say blue or dark green.

Thursday, May 9, 2013

The Right Shade of Nude


Stretch lace wrap dress
This week I was determined to join the lace trend so I started with a navy stretch lace purchased a few months ago from http://www.gorgeousfabrics.com/shop/index.php.  The pattern is a timeless wrap dress designed by Peggy Sagers at http://www.silhouettepatterns.com/html/patterns/p_4019.htm.  The pattern is suitable for both knits and wovens.  If I had chosen a non sheer fabric, this pattern would have stitched up in a few short hours.  I like the dress so much I plan to make a few more in solid color knits.  If someone were here today to help me with photography, I would prefer to show you a photograph of me wearing the dress.  The pattern is cut so nicely and the garment is particularly flattering.  The form doesn't do the design justice.
Collar and front facing detail
I may omit the collar from future versions as you can hardly see it.  The collar would likely show better if I used a solid color fabric. The front facings  are the underlining material interfaced with fusi-knit.  I think the nude facing blends in with my skin.  The lace would have looked good on the front facings, but I didn't have enough fabric and I really didn't want the lace against my skin.  A navy front facing might have looked heavy.

Cuff added for a neat hem finish
The sleeve is not underlined because my skin color matches the underlining color well.  An underlined sleeve might have made the design a bit too stiff and formal for my purposes.  To make a neat sleeve hem, I created a two inch cuff.  I wouldn't make the sleeve without a hem allowance as the lace is soft.  Turning under a one or two inch hem would have looked cheap. 

I had two nude stretch linings in my stash. The fabric on the left is a four way stretch tricot with a slight yellow hue.  Originally I planned to use this fabric to underline the dress.  The fabric on the right is a pink nude stretch silk with crosswise stretch only. 
These are nude linings from my fabric stash
With the lace laid on the nude underlinings, the color difference is minimized but in proper lighting the lining on the left looked unnatural on me.  I have eight yards of the yellow nude which can be used to line non sheer knit garments, so I am still happy with the fabric for future use.  I decided to use the pink nude for the dress.  If I were to suntan this summer, this dress might not look good on me.  To find the right nude, you really have to drape the fabric on yourself in good lighting.  Asking a few people whether they think you have the right nude is also helpful.  My students told me right away the yellow nude was wrong.
the lace minimizes the nude color differences
To underline the fashion fabric, I cut all the pattern pieces out of both the stretch lace and the pink nude lining.  I would normally diagonal baste the two layers together thoroughly.   The stretch lace proved difficult to hand sew.  The fabric kept pulling up and curling, in other words it wouldn't lay flat.
stretch lace does not cooperate with diagonal basting
I decided to diagonal baste across the stitching lines only.  The pattern comes with 3/8" seam allowances, so my diagonal basting reaches one inch into the garment.  The basting will be removed once the entire dress is sewn.  If you hand baste with silk thread, there will be no marks after pressing.
diagonal basting straddles the 3/8" stitching line
The collar frames the face so it is important to have the right and left sides of the collar matching in size and shape.  I took the collar pattern piece and make a photocopy.  I took a ruler and pen, and removed the 3/8" seam allowances from the photocopy.  Now the photocopy is a template.
A template is used to make the two collar sides match in shape
I laid the template on each side of the collar, and marked the stitching lines precisely.  I used an air erasable sewing pen.  The marks are visible for fifteen minutes.  I marked dots rather than straight lines to avoid stretching the fabric.
Stitching line is marked with air erasable pen
With a nice nude underlining and symmetrical collar, the dress is attractive and will be a nice addition to my wardrobe. 

I am so excited to be working on a day dress from the Dior Spring 2013 collection.  I plan to post the project soon.  The reason for the delay is just when I began the project, Vogue came out with a pattern that makes drafting the under dress much easier.  I thought that some of you would be more inclined to try the project if you had an easy starting point such as a commercial pattern.  Anyway I had to wait for my local store to stock the new Vogue patterns so I could purchase it.  The project is actually two garments:  an under dress which can be worn alone, and an overdress which can be worn over a skirt or pants.  Here is the outfit:

I really hope to post the project next week.  Happy sewing.

Saturday, February 23, 2013

Timeless Striped Pencil Skirt


Front single welt pockets can be sewn by beginners
 I have been teaching how to construct a lined pencil skirt with front single welt pockets, center back pleating, a traditional all purpose zipper, and fitted waistband.  The tutorial appears in the upper right corner of the Home page.  I stitched a khaki skirt for the tutorial which is a top color trend for fall 2013 women's wear (technically the color is called Deep Lichen Green).  The sample at right is black and white stripes which is a color combination that never goes out of style.  Indeed a pencil skirt is never out of style.  Please visit the tutorial if you would like to see how the skirt is constructed.
  
If you would like to see color trends for fall, please visit http://www.fashionising.com/trends/b--fall-colors-2013-winter-colors-27647.html.  Spring color trends can be viewed at http://www.pantone.com/pages/fcr.aspx?pg=21005.


pleats add visual interest and increase leg mobility
 Students will next be working on a traditional fitted shirt with collar, neckband, center front bands, buttonholes and buttons, long set in sleeves, cuffs and shirttail hem.  The tutorial with detailed construction steps appears at the upper right corner of the Home page as well.  Key to success is redrafting the collar and neckband pattern pieces to move seams from center front to the middle.  This removes bulky seams and increases stitching accuracy.  Once you learn the techniques, they can be applied to jackets and dresses as well.


Wednesday, January 23, 2013

Vintage Pencil Skirt

I am currently teaching how to construct a pencil skirt with welt pockets and center back pleating to my College of DuPage students.  The construction process will be posted as a tutorial.  To access the tutorial, go to the upper right corner of the Home page and click on "Index to Tutorials."  Click on "Vintage Pencil Skirt" and the construction will be updated weekly until completion mid-February.
Skirt Front
Skirt Back


You can purchase Burda 7252 online or at various fabric stores.  I have changed the assembly steps quite a bit to improve the quality of the garment so you may find the tutorial interesting even if you don't wish to sew it. 

Friday, December 21, 2012

Christmas Gifts 2012

Here are photos of a few garments I made to give as gifts this Christmas:
Cotton toile vintage apron
My sister loves all things french and vintage.  I found lightweight cotton toile at fabric.com.  The apron is lined with white cotton broadcloth and the waistband is navy cotton broadcloth.  The pattern is B50-5490 from evadress.com
Apron back view
 The apron is a little above the knee in front and just covers the hips in back.
Stretch cotton sateen biker jacket
This is a biker jacket for my niece in Arizona. A biker jacket has become a wardrobe classic.   The pattern is a modified discontinued Burda pattern.  I would like to offer a good biker jacket pattern on my blog in 2013 with instructions since it is such a popular garment.
My niece loves green anything!
My other Arizona niece needs a biker jacket as well.  Her green jacket includes yokes on the upper sleeves and satin trim above the cuffs.  The jackets are fully interfaced to help them maintain a firmer shape.  If I hadn't interfaced the jackets, they would be fine, just more casual and wrinkled during wear.  I have a third niece who is waiting for a black/gray biker jacket.
An embellished rayon/lycra tee for Grandma
My mother needs comfortable knit tops to play bridge in, and this metallic stretch rayon tee will be fine for her. I interfaced a 4" wide band of fabric, stitched it into a tube, and applied the band down center front (also interfaced with a 1/2" strip on inside) with three twists.  I machine stitched horizontal rows to hold the twists in place.


Lastly, a toddler dress for my neighbor. 

Toddler dress front view
 The dress and belt are cotton broadcloth.  The skirt features an embroidered lace overlay and ruffled slip beneath.  I placed 1/4" horsehair braid in the pink broadcloth hem for a little extra lift.   

Toddler dress back view
Merry Christmas and have a Happy New Year!