Showing posts with label Sewing Level: Intermediate. Show all posts

Saturday, October 29, 2016

Bead a Basic Button-Down Shirt


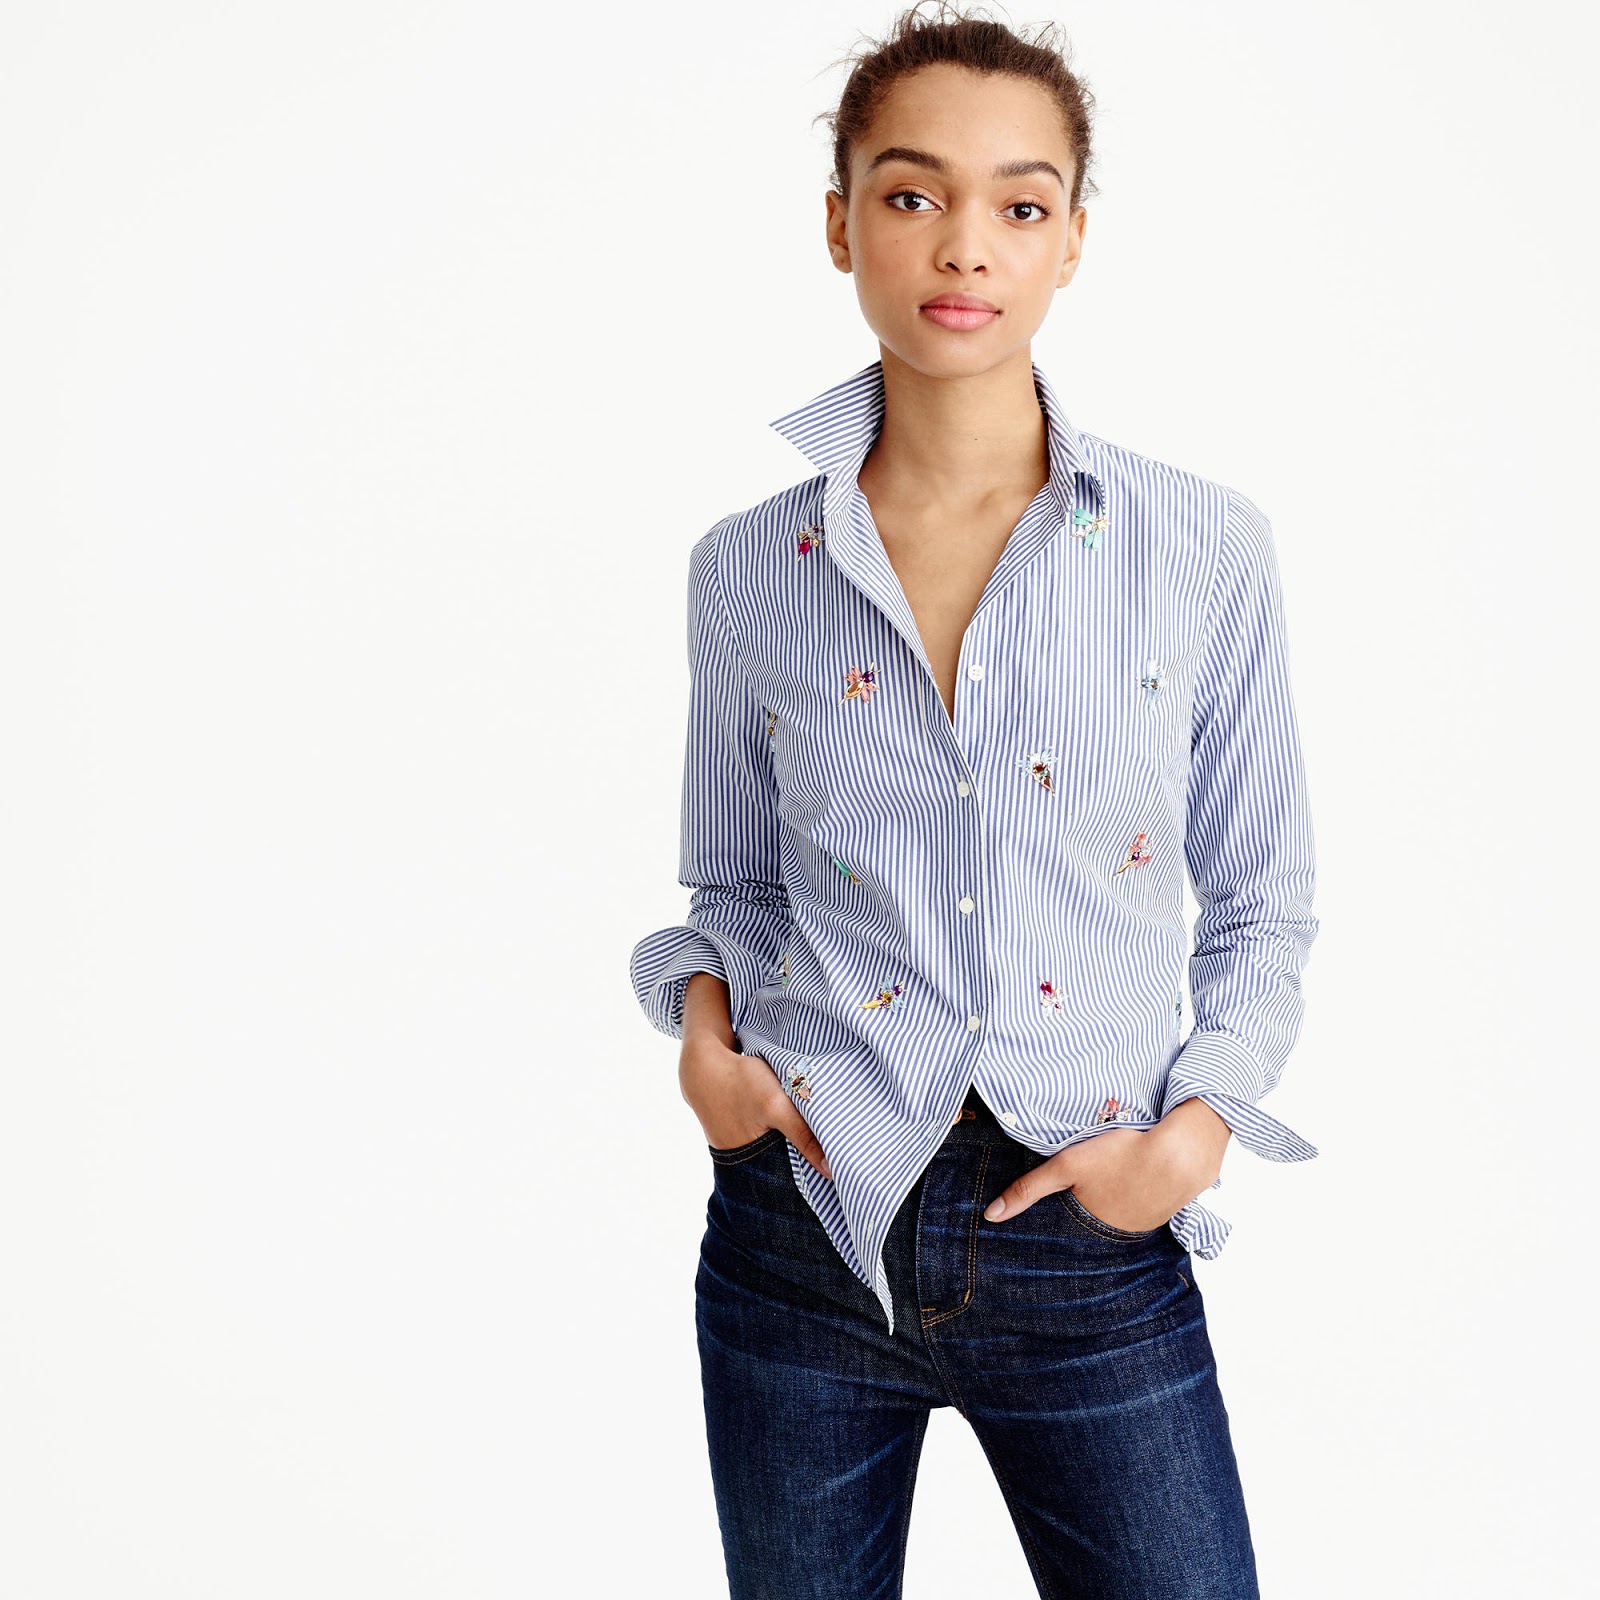
I fell in love with this $100 blouse sold out at J. Crew recently. A blue and white stripe button down with jeweled bees fits nicely in my casual wardrobe. Each bee is embroidered with unique-shaped beads.
Since the fall is a busy time for me as a teacher, I am sewing relatively simple projects in my limited sewing time. I recreated the bee blouse first with a white linen from Vogue Fabrics. The bees are $6 worth of  iron-on transfers purchased recently at a sewing expo.
While I prefer the multi-faceted beads used by J. Crew, I didn't feel I had the time to source them nor did I want to spend much on the embellishment.
Bee Embellishment
In my button stash are satin bridal buttons from my custom sewing days. They raise the style of the blouse from basic to a little special. The buttons are spaced closely to prevent gaps and also to embellish the blouse.
Today is a beautiful, breezy fall day as you can see in the photo.
The blouse pattern is Butterick 6097. If you are interested in the blouse construction details, I have created a 3-part tutorial that features photos of each construction step. See the Index on the right column of the blog.

I had a vintage-inspired cotton print purchased from the Vogue Fabrics bimonthly swatch club. It stitched up nicely into a duplicate blouse.
I used bronze beads I had in my stash to add subtle interest. Again, I did not feel I had time to do a serious bead search. I used materials I already owned which feels nice.
I covered the buttons in self-fabric. It was too hard to find buttons that worked with the fabric. I like 3/8" buttons for blouses though 1/2" is sometimes okay. I don't like the heaviness that a larger button can add to the look of a blouse.
The pattern has lovely shape due to the waist seam and front and back princess seams.
I made a muslin over the summer. A muslin for a fitted shirt is essential even if I have sewn from a given pattern line. A well-fitted shirt can work for years and I have favorite blouses in my wardrobe that were made more than twenty years ago. 

I start with a full-body muslin with no sleeves.

Fit of front, side, and back are checked and corrected.
Sleeves are then added. Sleeves can highlight shoulder length issues so I always add both sleeves which is extra work I would prefer to not do.
Enjoy the mile fall weather this year, at least in Chicago!

Saturday, July 25, 2015

Two Months to Sew a Denim Blazer!

I started a denim  blazer back in early June thinking that my sewing schedule would return to normal after two years of graduate studies.  Just before the graduation ceremony I decided to take four extra classes over the summer so my sewing was again delayed. 
Well, the four classes are completed and I finished the blazer.  
There is no interfacing in this jacket; I relied solely upon the fabric weight for structure.

Flat Fell Seams are synonymous with denim.
The top three buttonholes are functional.

Here are a few construction details.

1. I used an evaporating marking pen to mark the exact placement of the collar panel at the neck/shoulder seam.  See the "X" below.  It is very easy to be inaccurate sewing this area and the appearance of the collar and laps is greatly affected.
Neckline of Jacket Back
Here are the collar panels joined at center back.  I fused interfacing at the corners, marked the exact stitching lines with the evaporating ink marking pen, and stay stitched the corners.  These steps are not difficult nor time-consuming but they ensure I will stitch the seam just once.  By the way, the jacket is completely non-interfaced but for these two small squares.  My thinking was that the jacket is a mid-weight stable denim and should not hang too firmly.  I haven't made a jacket without interfacing in at least two decades!  A leap of faith.
Clip to the stitching lines which are reinforced with interfacing and stay stitching.  I  marked the stitching lines so I could see exactly where to stitch.
Here is the shoulder/back neckline seam.  Note the two sharp corners on either side of the neck.  All the marking/stay-stitching/interfacing paid off!
View of shoulder and neck seam from inside.  Note the seam allowance wides towards the sleeve because I am using a thinner shoulder pad than the pattern expects.
2. Armhole looks good with the thin shoulder pad.
3. I used a cool floral lining for the jacket.  I wanted a print that related to the vintage theme but added color just the same.  The lining is polyester.  I usually line in silk rather than polyester but for no particular reason I felt silk was a mismatch with the faded denim.
4. To build roll into the collar, I pinned the neck edges of the garment and facing at the back neck edge.  The two seams will be hand stitched together soon but for now they are just pinned.

I roll the collar back in place keeping the under and top collars aligned.


See how the under collar extends beyond the top collar in the photo below?  This happens when the under and top collar patterns are the same.  I removed the excess fabric so the collar rolls nicely.
Below is a photo that shows the garment and facing stitched right sides together.  You can see 1/2" of under collar fabric sticking out along the back.  This is trimmed away.

I have so many projects planned and my flower garden is gorgeous.  A great summer!
 
Happy to graduate!

Monday, June 8, 2015

Spring 2015 Dior Jacket

I love the diagonal line of buttons on this embroidered linen jacket.
While I like the entire outfit, I do not wish to make it.  I would like to make a more traditional-style blazer that does not cut away to reveal my abdomen (you guess the reason).  I will also omit the colorful embroidery.  Sometimes I duplicate a designer garment closely, but this time I am taking inspiration only from the buttons and buttonholes.  I am looking for year-round wearability in a casual but unique jacket.

I purchased very bleached out cotton denim from Fabric.com.  It is light blue, but barely.  No holes or rips though.  Denim makes great jackets; they go with everything.
Any blazer style will work but I like the large lapel on Silhouette #1953.  I will place buttons and buttonholes along the lower edge of the right lapel from lapel corner to where side seam meets hem.  Here is the jacket muslin:
Fit is good but I will add a little more ease in the hip area, 1-2" total.  The pattern uses 1" shoulder pads, but I have placed much thinner pads under the muslin.  It is easy to make me look broad-shouldered, so I am opting for a smaller pad.  I will have to adjust the angle of the shoulder seam, making no change at the neck but stitching an additional 1/4" at the armhole. 
extra room because of the small shoulder pad
I may raise the underarm a little bit, perhaps 1/2".  I want to fit layers under the jacket so I won't overdo the close fit.  Fit in back is fine.
It feels so nice to be sewing for enjoyment again.  Many of you noticed my absence from blogging January-May 2015.  My graduate school commitments kept me busy.  I am looking forward to graduation end of June, and a more manageable schedule once again.  I earned a masters in special education, and endorsements in Spanish and bilingual education.  Please wish me luck as I search for a new teaching position in special education or bilingual education!

Friday, November 14, 2014

Wool Shrinkage during Jacket Construction


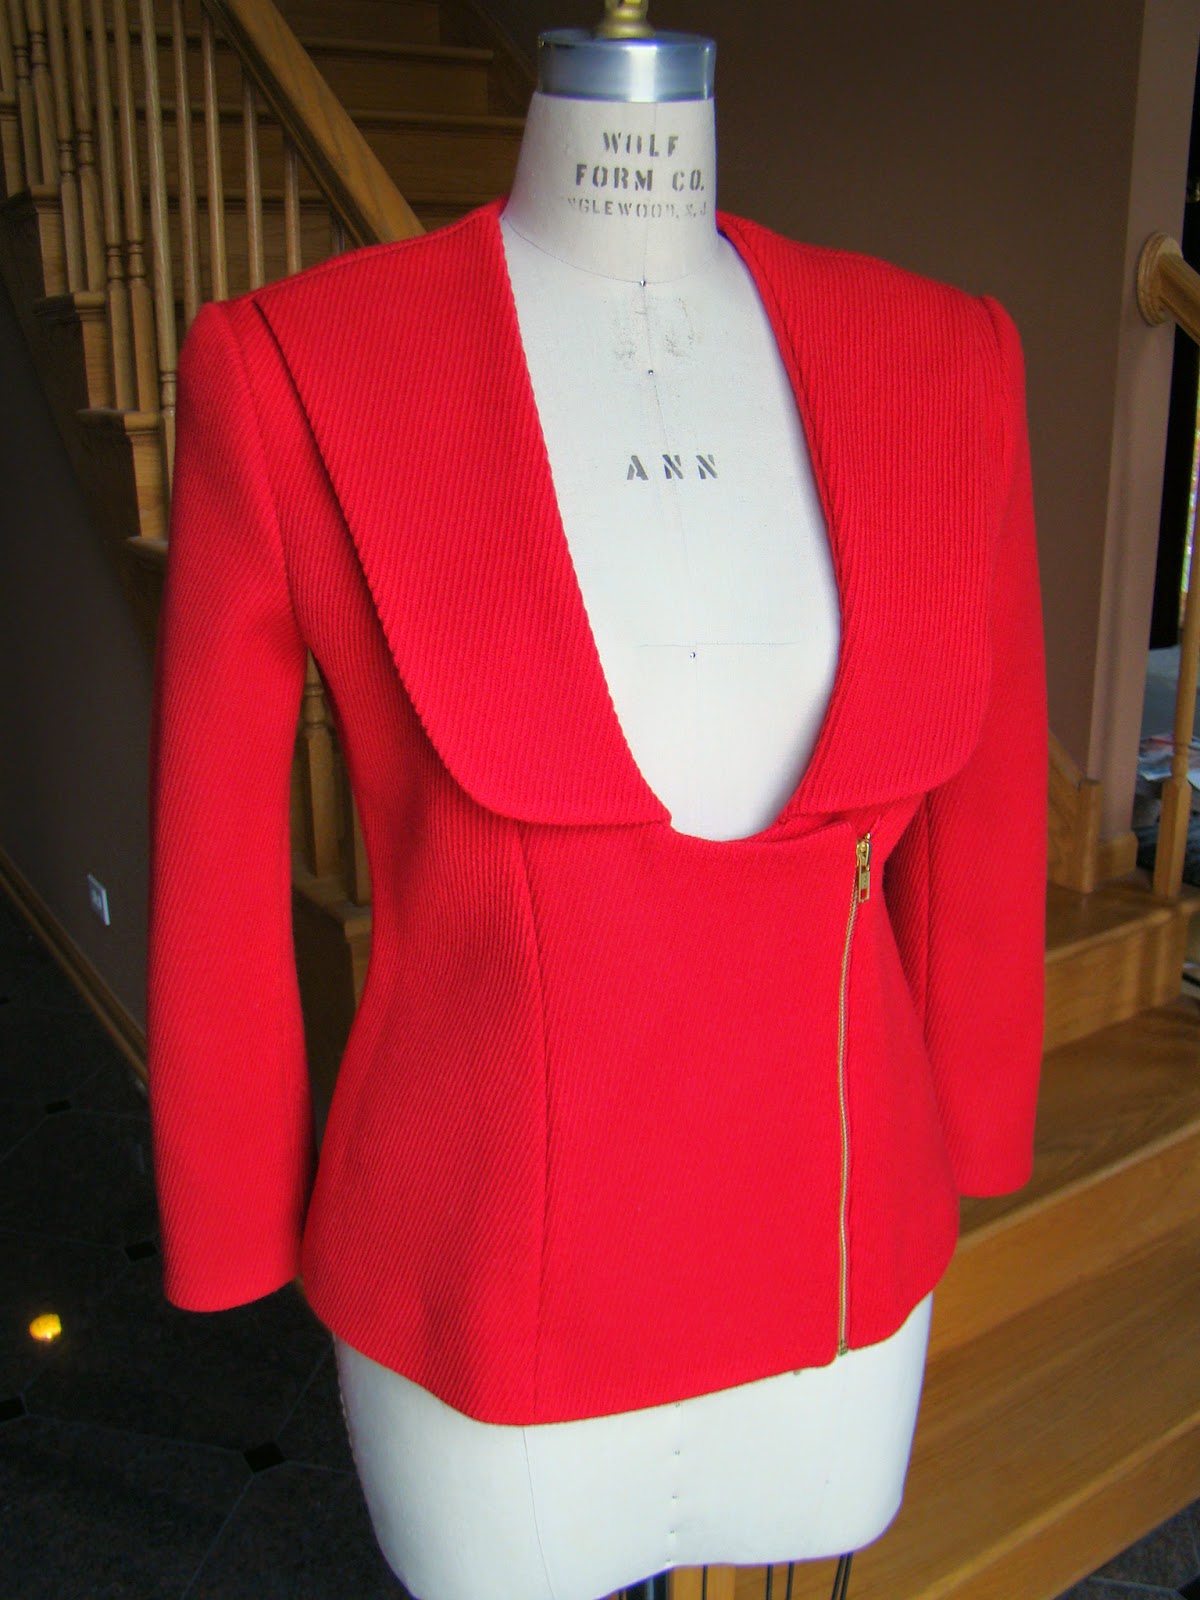
Front lapels are joined into the shoulder seams; an unusual design feature that is easy to sew


I've been wanting a red wool blazer for a long time: red provides a boost to many neutral trousers in my wardrobe.  It also makes me feel energetic and young.  The pattern is #119 from the July 2010 issue of Burda Style.  The wool was purchased at Mood Fabrics last winter.  It has a three dimensional twill weave as shown below.
Twill weave
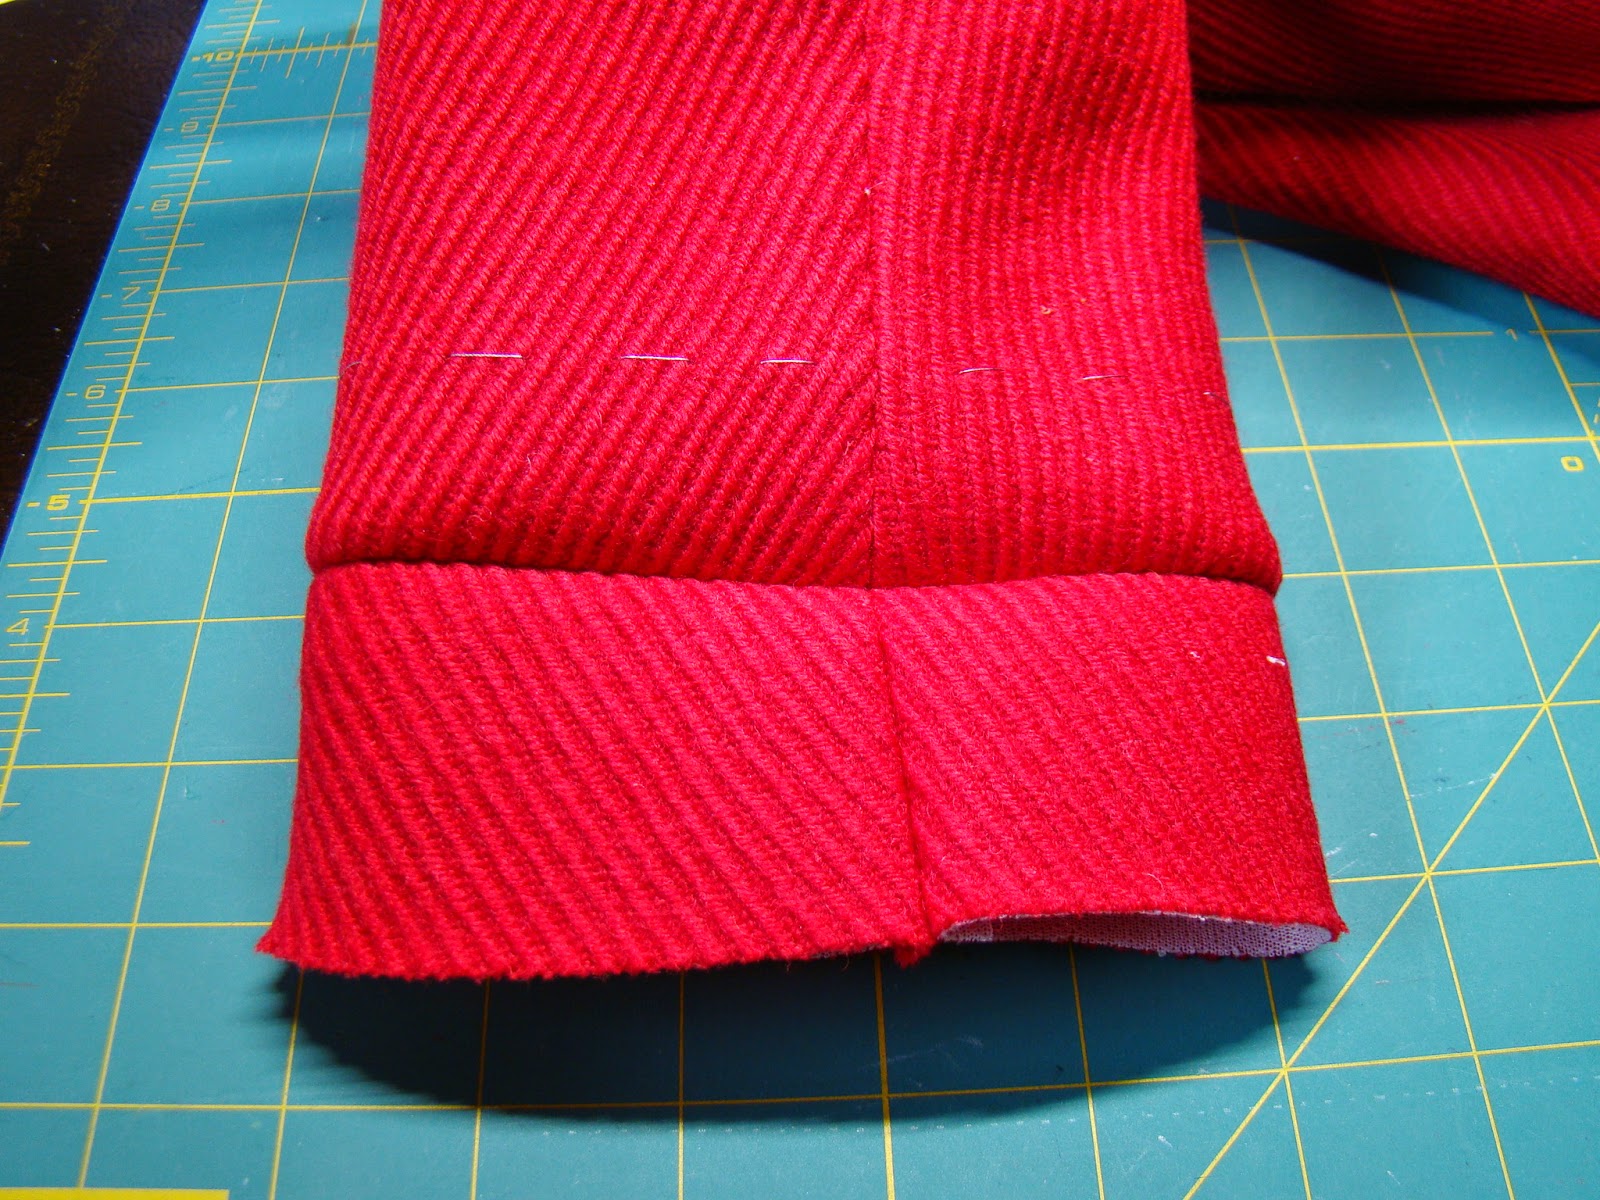
As usual, I steamed and pressed the wool before cutting out the garment panels.  Then I applied fusi-knit fusible interfacing, my go-to interfacing for at least fifteen years, to all garment panels.  When I laid the pattern pieces on top of the fused panels in preparation for marking, I noticed the panels had shrunk 1/2" in length.  Below is a photo of an under sleeve.  Note the shrinkage in the hem allowance.
1/2" shrinkage in length
Fortunately I did not loose circumference.  I took the 1/2" shrinkage from the garment hem allowances and marked the original finished hem length.
Use tracing paper to mark original hem length
I thread traced the hem allowances with silk thread so the hem lines were visible on the right side of the garment panels.
Sleeve with 1 1/2" hem allowance instead of 2" due to shrinkage
My problems with the garment body were solved, but I will return to discussion of the sleeve length soon.

Below are the two sleeves.  The vertical seams have been stitched.  The seam allowances have been pressed open on the left sleeve.  The seam allowances have been pressed and hand catch-stitched to the interfacing on the right sleeve.  It took maybe 1 1/2 - 2 hours to catch stitch all jacket vertical seam allowances.  The benefits are (1) seam allowances that lay flat after many wearings, and (2) less friction between the garment and the wearer's body.
Seam allowances catch-stitched on right side
Back to the sleeves.  I must have made an error when I analyzed the fit of the pattern in muslin because the sleeves of the final garment were way too short.  I took 1" of additional length from the 1 1/2" hem allowance which was originally 2".  A bias cut rectangle 2 1/2" x 11" was seamed to the cuff so I would have a proper 2" hem allowance.

Seam a hem facing to the sleeve cuffs
The photo below shows the sleeve cuff with a 2" hem allowance.  The jacket is saved.  I used to get upset at these occasional sewing errors, but I have learned to accept them.  I think they are inevitable no matter how long a person has sewn because fabrics behave differently, equipment malfunctions, tastes change, etc.
I still don't understand why the wool shrunk so much in length.  The wool is not a loose weave, however it is also not tightly woven like traditional wool suiting fabrics.  Next time I fuse interfacing to a wool fabric, I might add 1/2" to the hem allowance for insurance.  Have any of you had this problem recently?
A rare "selfie"
I like this pattern enough to make another jacket or two.  My plan is to experiment with the lapels and maybe add pockets.

Saturday, October 18, 2014

A Classic Black Leather Dress

The value of this leather dress lies in the usage of large leather panels, as well as custom fit.  I frequently see leather dresses in designer shows, with price tags of several thousand dollars.  A high price point is associated with large leather panels and minimal piecing.  My dress has twelve leather panels: six in the bodice and six in the skirt.  The skirt features particularly large leather panels.  A similar dress at a lower price point could have double the number of panels to reduce the amount of leather required.
My original concept for the black leather dress was a princess seam bodice,short set-in sleeves, and a skirt with deep pleats along the princess seams.  The muslin is below.
First muslin design was rejected
The muslin dress was boring, even frumpy.  I realized that a more narrow style was required.  I found an interesting pattern in the Autumn/Winter 2014 Burda Easy magazine.  The pattern has an inverted triangle inserted into the bodice center, and a triangle inserted into the skirt center.  Darts are incorporated into the seams that join the triangles to the fronts and backs.  The shaping was not fitted enough for my taste, and the photo below shows pins removing excess fabric from the bust to the waist at center front.
Sheath style dress with triangular insets is interesting; pattern #4G
In the above photo, I pinned out excess fabric in an angled manner because I was tired and not thinking clearly.  The next day, I straightened the excess fabric into vertical darts below.
I added front darts to define the garment waist more
The dress back needed a sway back adjustment as evidenced by the row of horizontal pins at the waist back.  I didn't add darts to the garment back.
Sway back adjustment is needed
The sway back adjustment caused the side sides to no longer hang straight.  They noticeably swung to the back. 
Side seams are swinging to the back rather than straight down
Here are the  #4G pattern pieces:  Front, Bodice Front Inset, Skirt Front Inset, Bodice Back Inset, Skirt Back Inset, and Back.  Later I added a narrow, one piece short sleeve with zero sleeve cap ease.
Burda 4G pattern tissue
As recommended by the University of Fashion leather sewing series, I applied fusible tape along all garment edges to control stretch during sewing. The triangular insets are fully interfaced, but the rest of the leather pieces have fusible tape only along the seam and hem allowances.
3/4" fusible tape, 1/2" seam allowances, 2" hem allowances
To control bulk, I used lapped seams for the triangular insets.  First I chalk marked the stitching lines on the fashion side of the leather.
Dress Back
I used Sobo Glue, but other people like Barge cement.
Glue basting for precise panel placement
The triangular insets were glued in place, then edge-stitched and top-stitched in place once the glue was dry.
I let the garment back dry before top-stitching the triangular inset panels
Below is the bodice front.  I made sure that the glue process maintained a curved shape over the bust line.  There is a dressmaker's ham underneath to help shape the garment as the glue dries.
Glue curves into the garment as needed
Detail of Skirt Back Inset
Detail of Bodice Back Inset
After this project and the silver leather jacket sewn in September, I feel that's enough leather for a while.  I am looking forward to sewing Fall jackets and a coat with woven fabrics.