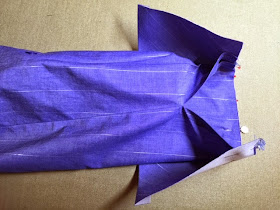
Steps 15 & 16 Build Cuff
Press 1/2-5/8" on long un-notched edge of cuff.
Fold and press pleats into sleeve as marked. You may need to adjust the depth of these pleats later to fit the cuff.
Press seam allowances down towards cuff. Trim.
Fold cuff right sides together, placing fold 1/8" past edge of cuff that joins to lower sleeve. Stitch seam.
Trim seam allowances, then turn cuff right side out. Press.
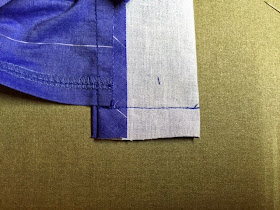
Fold down pressed edge 1/8" past joining seam line. Pin in place on inside of cuff.
Stitch in ditch to close cuff.
 |
| View from inside of cuff |
 |
| View from outside of cuff |
This pattern has a set in sleeve with gathers. Many shirts my COD students are sewing have set in sleeves without gathers. The setting procedures are the same; the difference is in how many gathers are placed in the sleeve cap. Read on.
Stitch two rows of basting threads in sleeve cap, between front and back notches, 1/4" and 1/2" away from raw edge. Do not back tack, and leave the thread tails attached.
Pull all four threads at each end of sleeve to inside of sleeve.
Pull up back gathering threads. In the below photo, it appears I am pulling the two threads at the 1/4" stitching line; in truth I am pulling a thread from the 1/4" row and a thread from the 1/2" row.
Since my sleeve has gathers, I pull up the basting threads to make a gathered sleeve cap. My COD students do not have gathers in their sleeve caps. Therefore they should pull the basting threads to ease or reduce the size of the sleeve cap without gathering it. When you pin the sleeve into the armhole, there will be no gathers or pucks, just pulling of the basting threads to reduce the sleep cap down an inch or two in size.
Stitch the sleeve into the garment armhole. Press seam allowances down into the sleeve. Clean finish the raw edges by either (1) serging raw edges or (2) hong kong finish the raw edges. It is not particularly easy to serge an armhole given the curved shape.
The set in sleeve.


No comments:
Post a Comment